This section walks you through the exact process of applying tags to multiple contacts from the Contacts page.
Navigate to the “Contacts” Tab
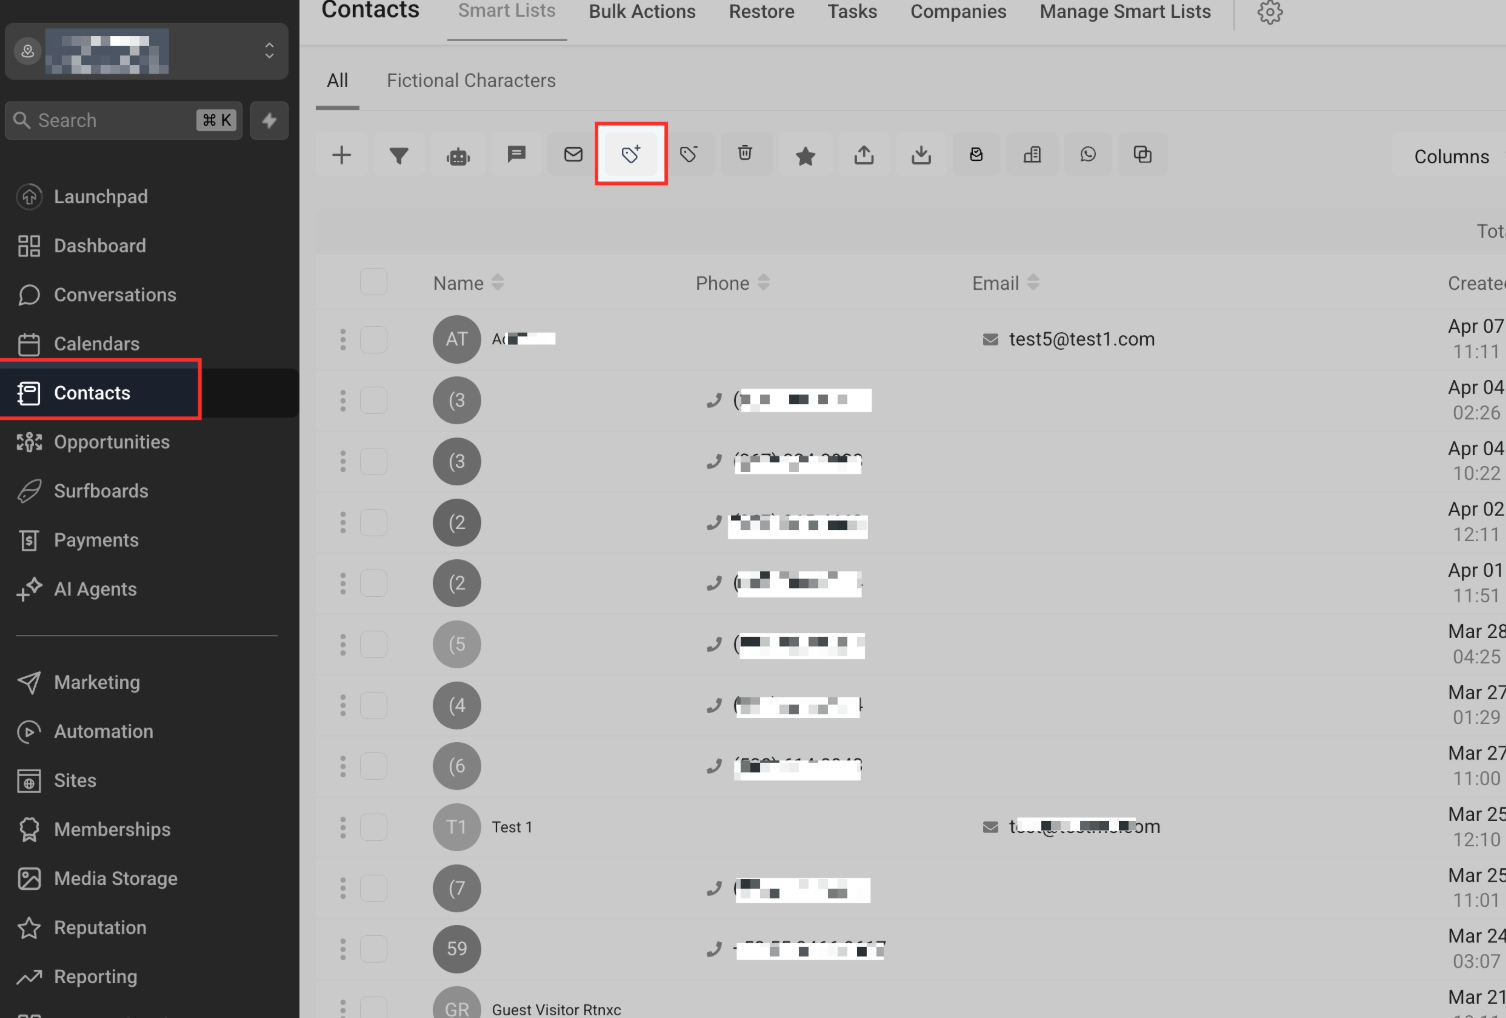
From your dashboard, click on the Contacts tab in the left-hand navigation menu.
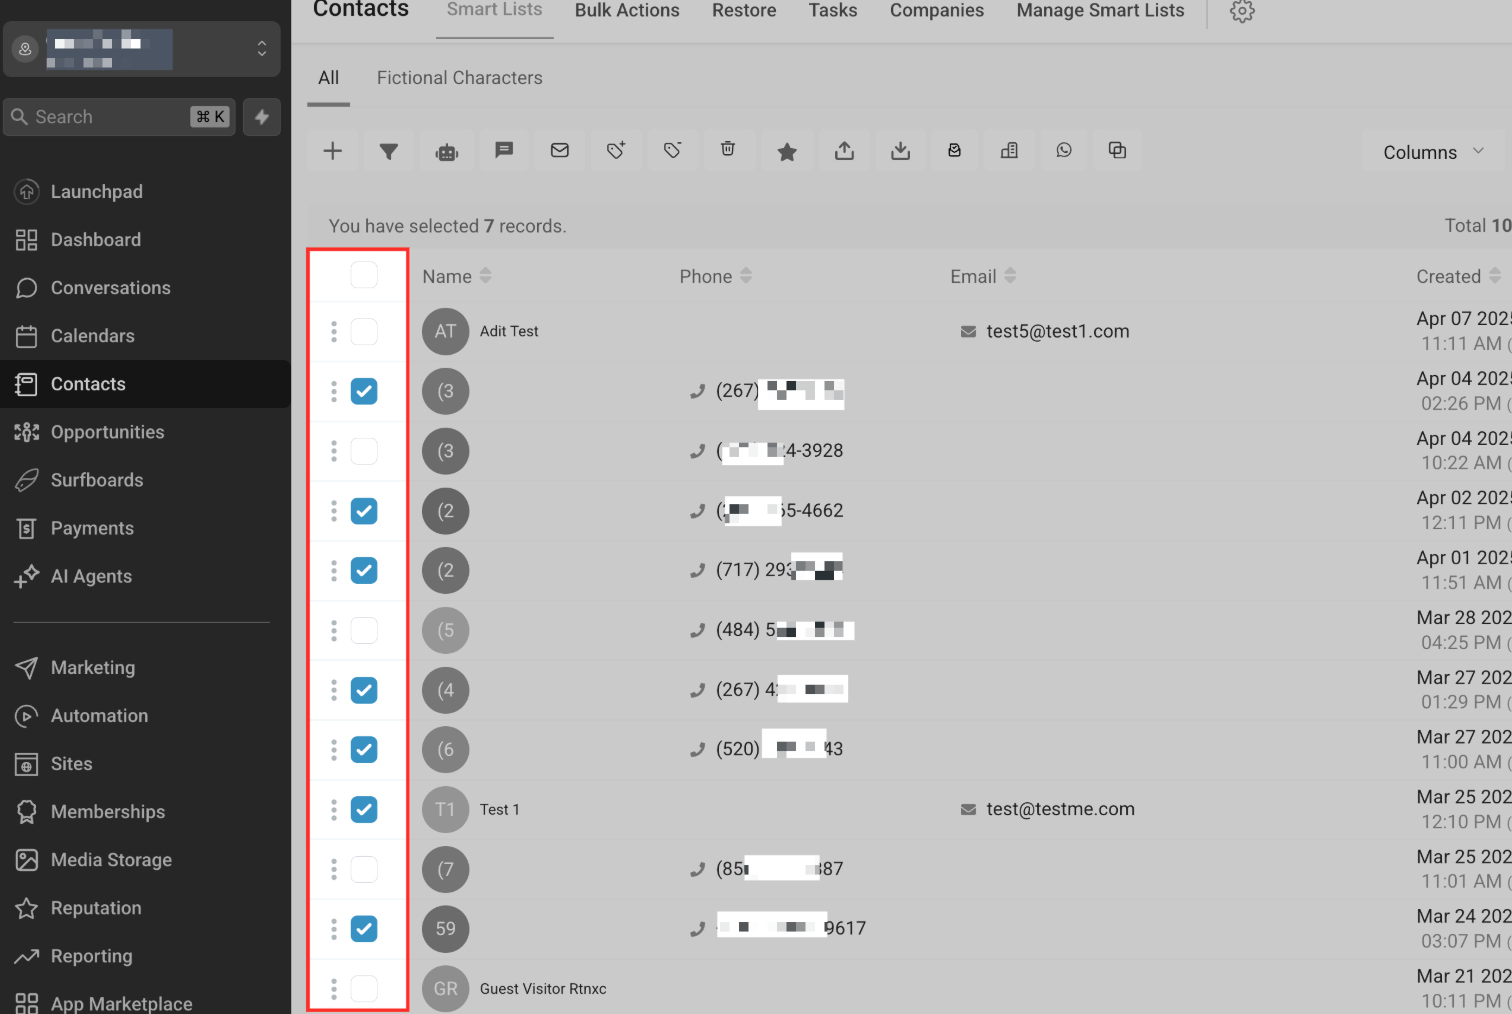
Select Multiple Contacts
Use the checkboxes on the left side to select the contacts you want to tag. You can select as many records as needed.
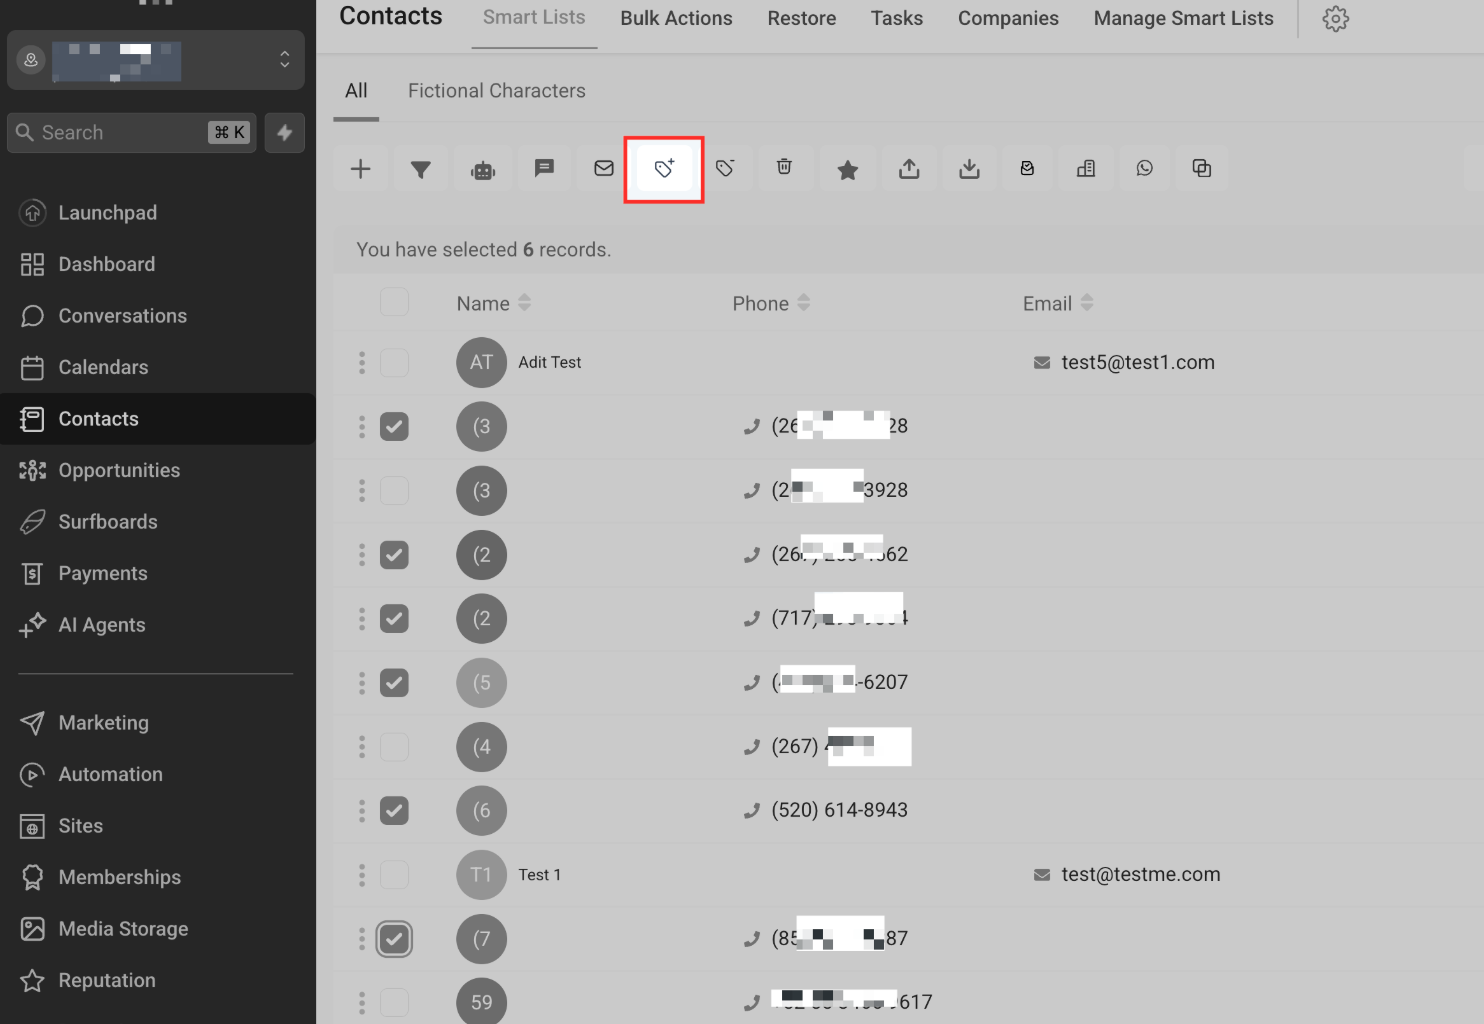
Click the “Add Tag” Icon
Once contacts are selected, click the Add Tag icon from the action bar at the top of the screen.
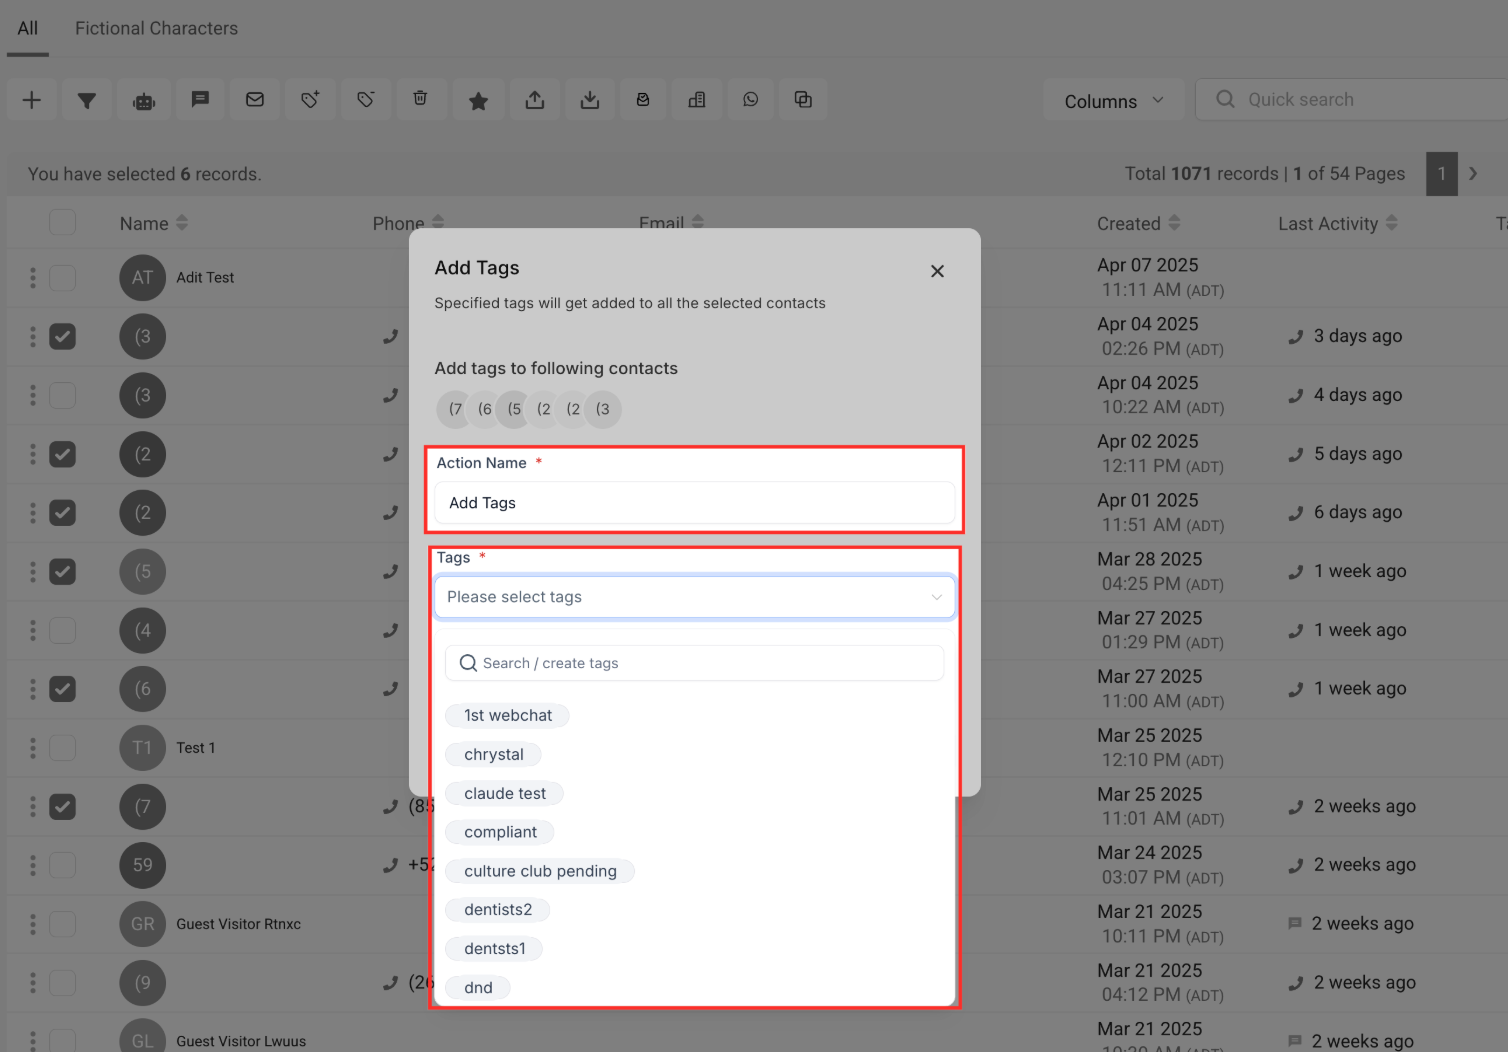
Add Action Name and Tags
In the “Add Tags” pop-up window, Give your action a name under Action Name field. Next, Click the dropdown from the Tags field and select one or more tags from the list.
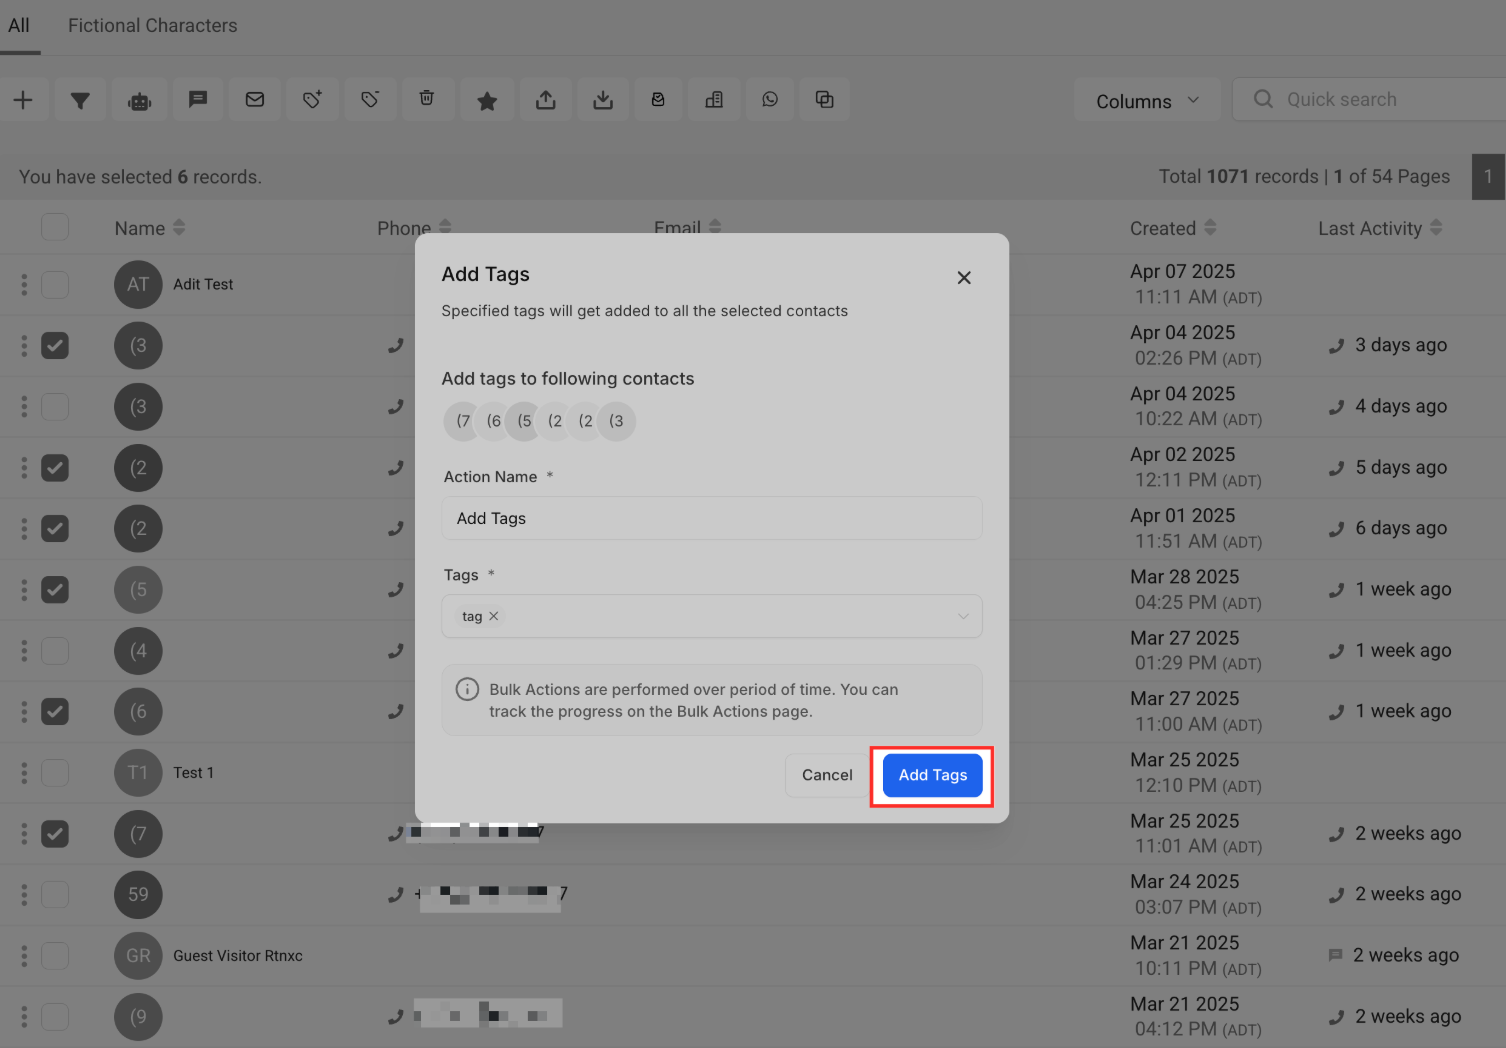
Click “Add Tags” to Apply
Once the tags are selected, click the Add Tags button to begin the operation. A confirmation message will appear.
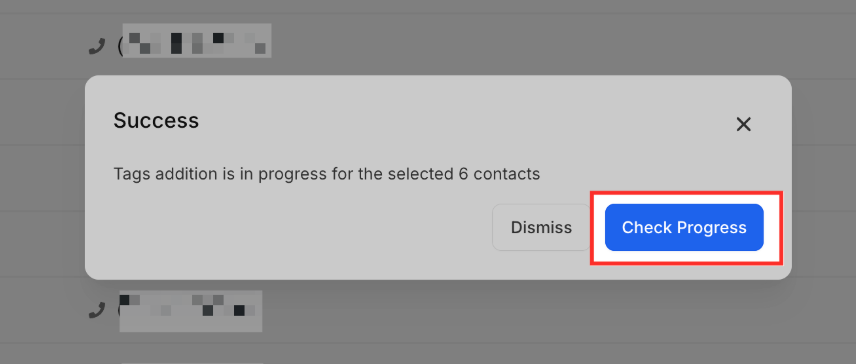
Track Progress
This confirmation popup appears right after clicking “Add Tags”. It informs you that the tag assignment is now in progress for the selected contacts. To monitor the operation, you can click the “Check Progress” button, which will redirect you to the Bulk Actions tab where you can track the success or failure of the task in real time.
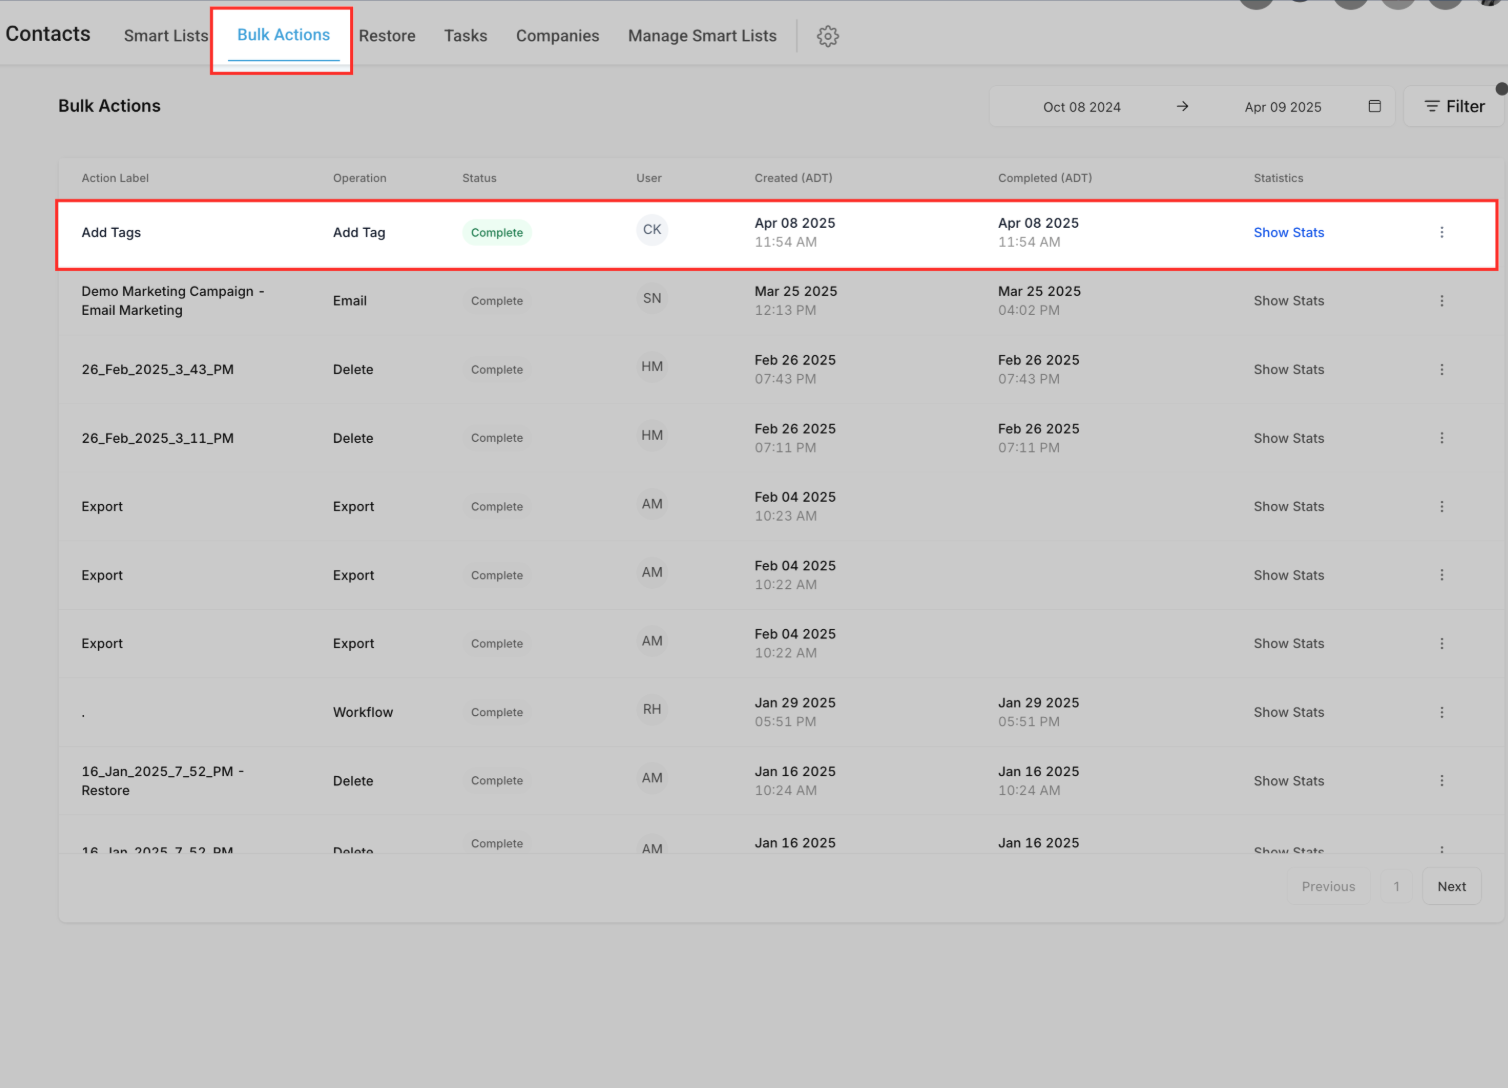
Track the Bulk Action Status
The highlighted area shows your bulk tag action has been completed successfully. You’ll see the action name, who performed it, when it was created, and a “Show Stats” link to review the results. This helps you confirm everything was applied as expected.