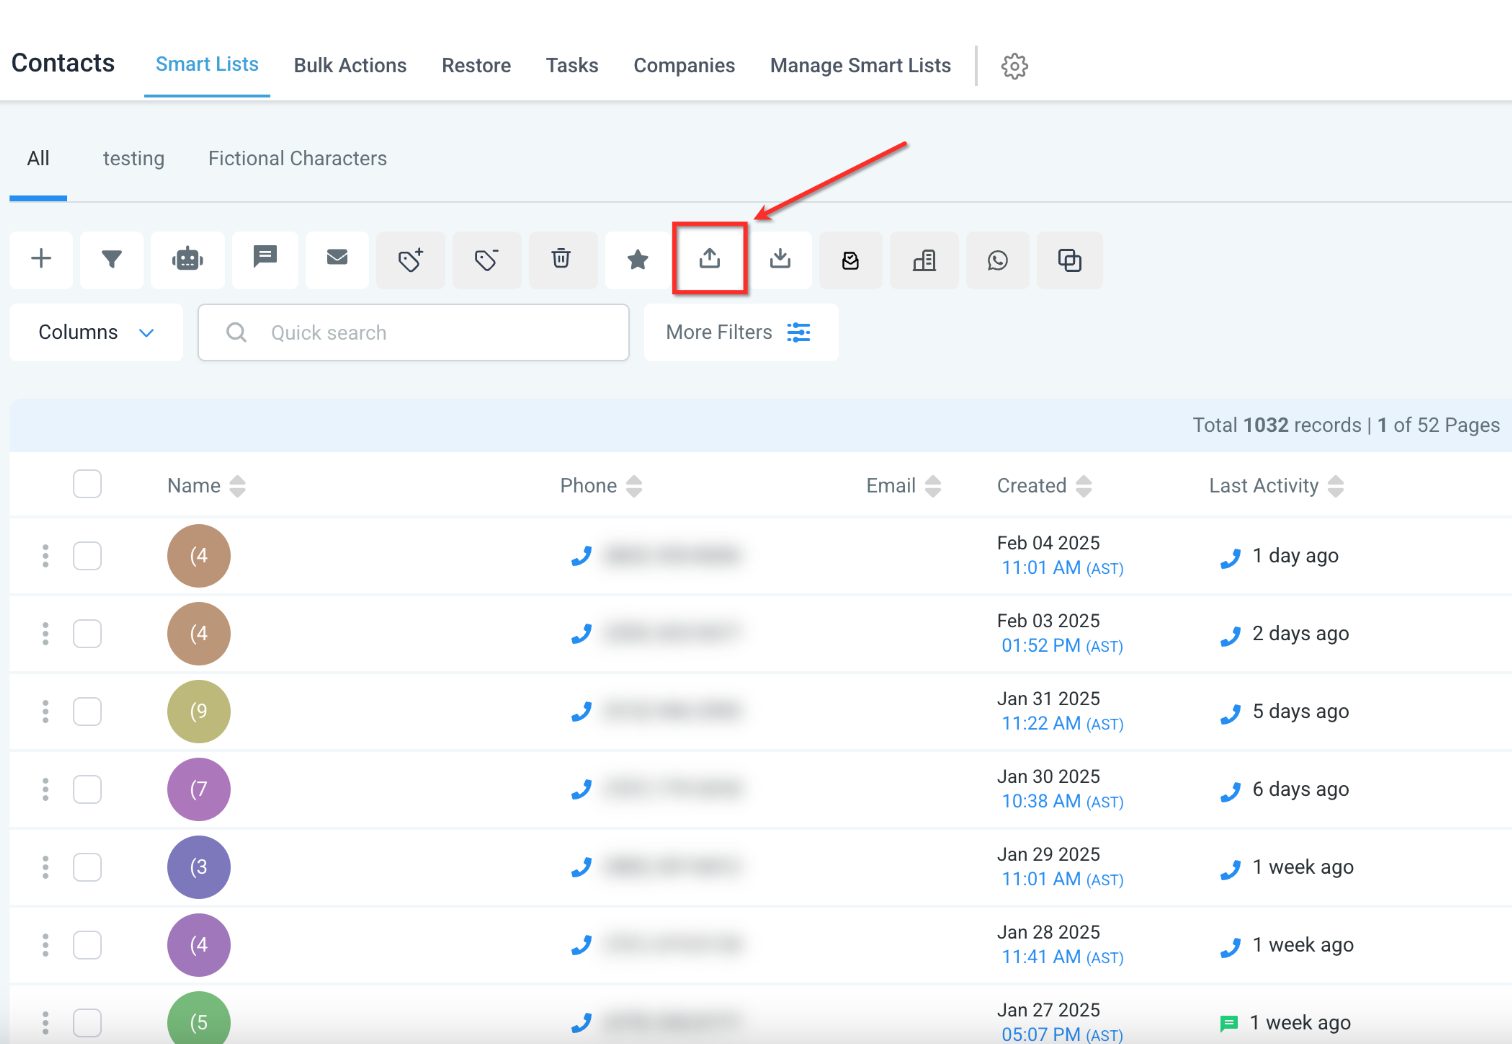
These steps depict a direct export functionality, where once you select the contacts and press the Export button, the system immediately processes the request and downloads the CSV file directly to your local system’s Downloads folder. There is no additional confirmation or email retrieval needed—the file is instantly available on your computer storage.
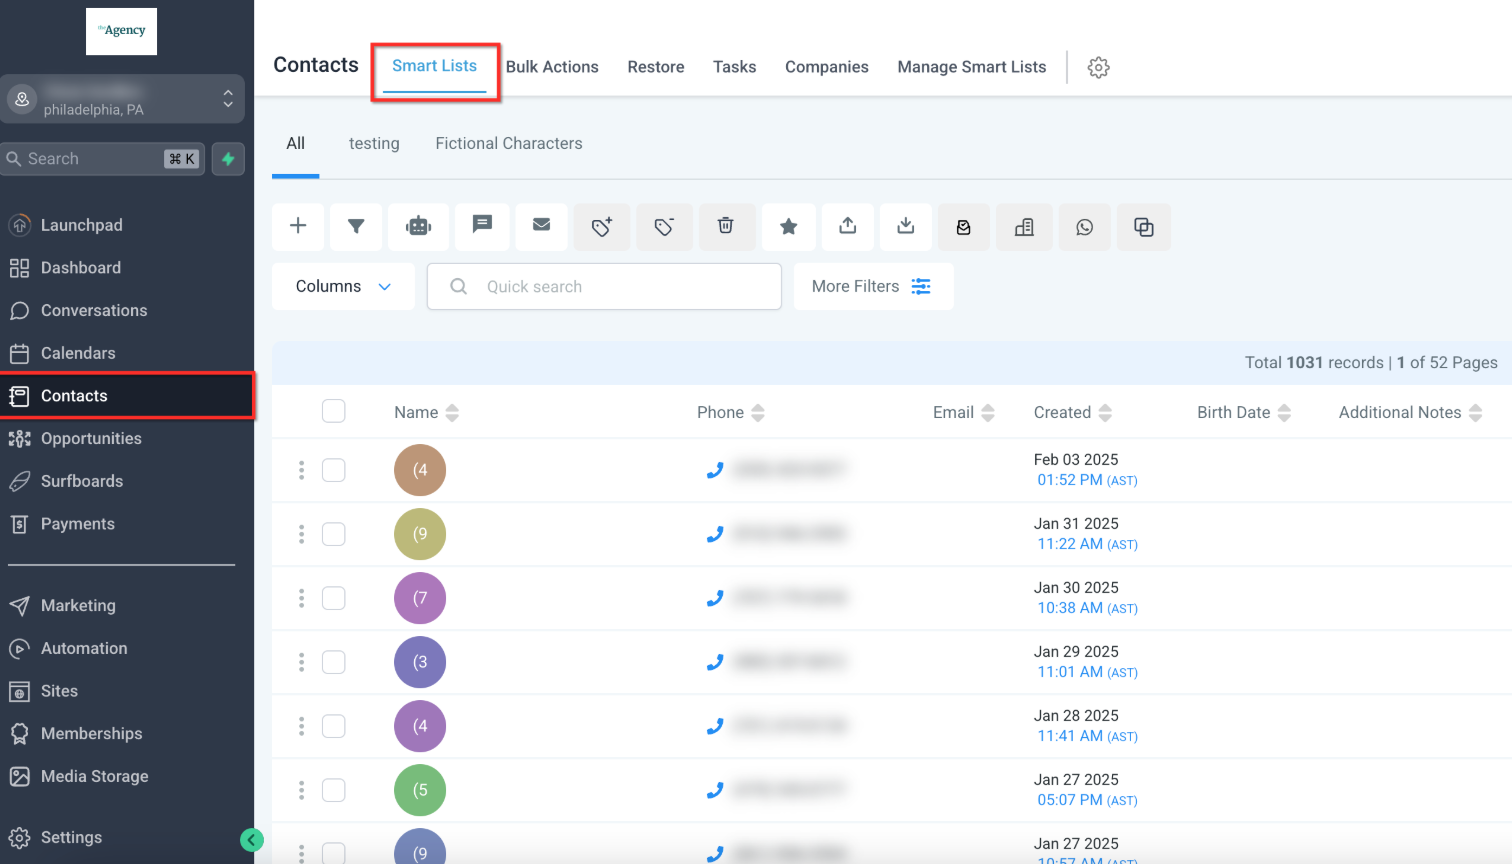
The Contacts page is where all your leads, customers, and business contacts are stored. This is the starting point for exporting your data. Navigate to Contacts → Smartlists.
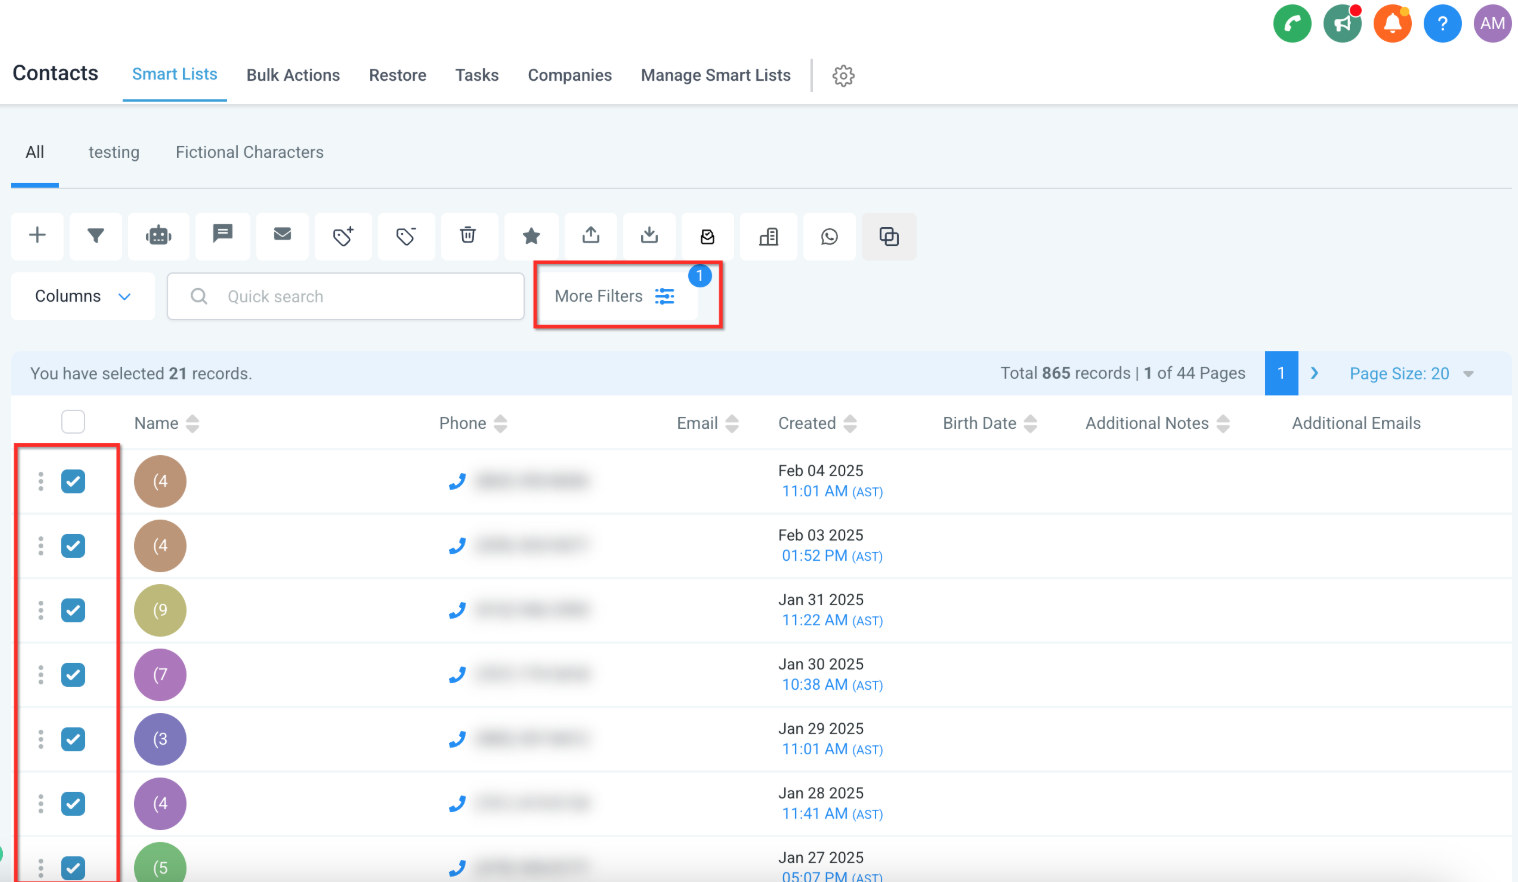
If you only need a specific group of contacts (e.g., leads from a particular campaign or customers from a certain location), use the filter options to narrow down the list. Otherwise, you can export all contacts at once.
Use the filters at the top to refine your selection (e.g., filter by tags, Smart Lists, or specific attributes).
Check the boxes next to the contacts you want to export.
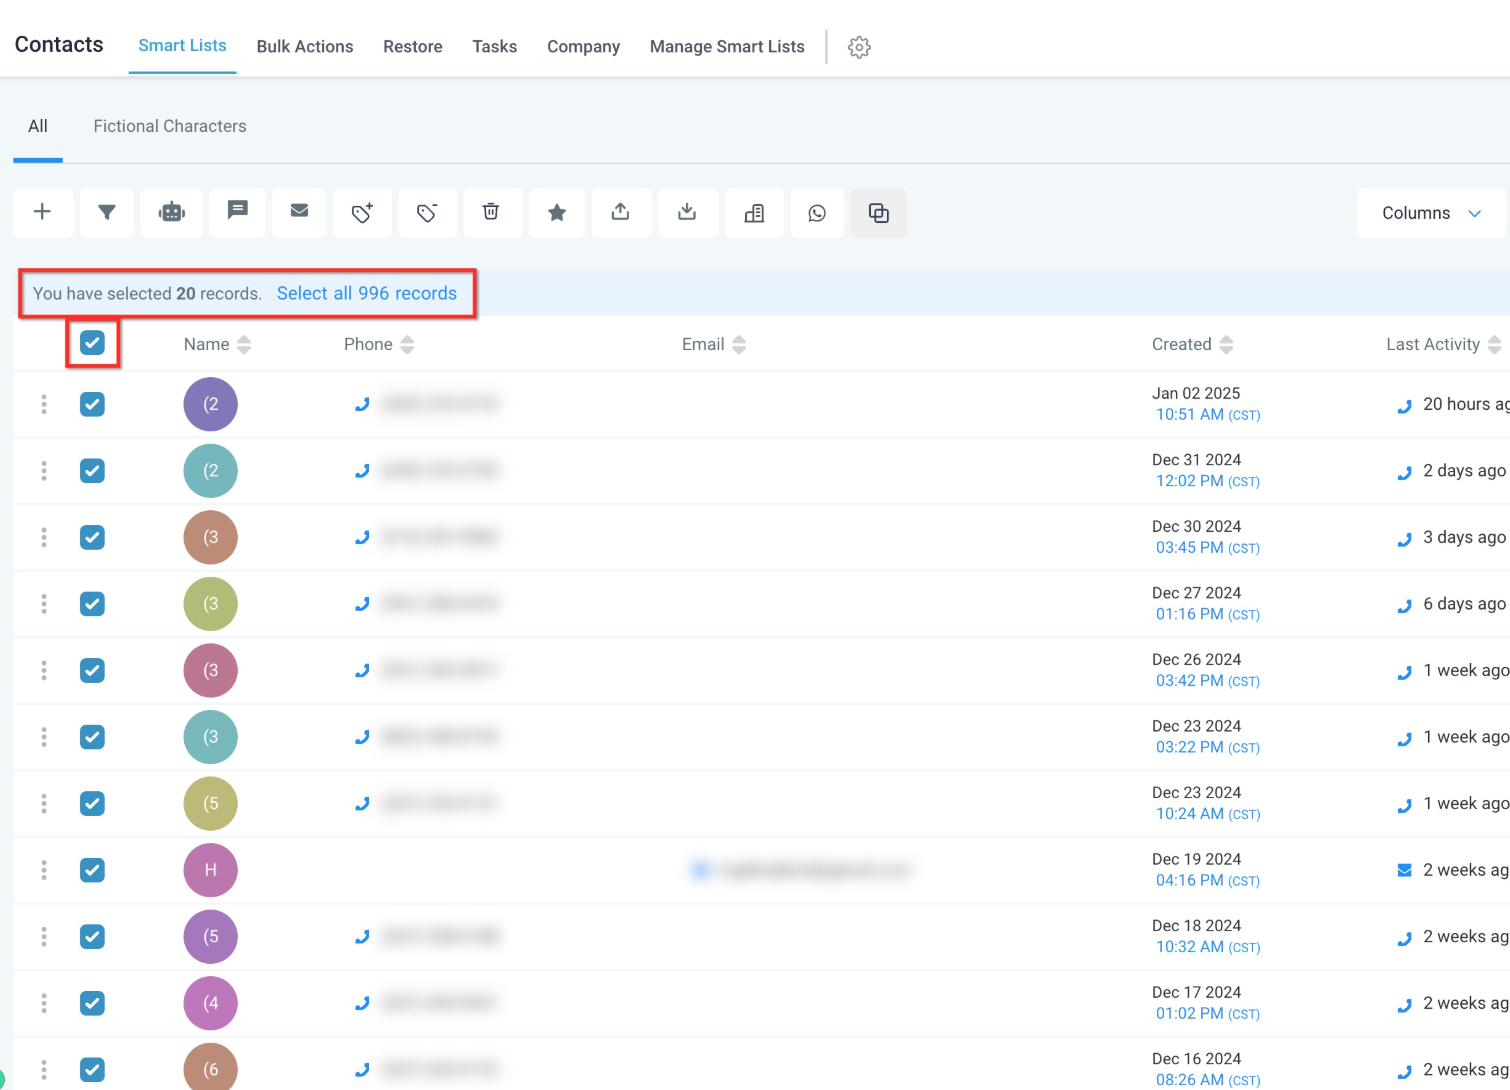
To export all contacts, click on the checkbox beside the filter fields (on the left) and click on Select All Contacts.
Click on the Columns button. Check or Uncheck boxes to include or exclude specific columns in the export. Once you’ve selected the desired columns, they will be reflected in the Exported CSV file.
*Note: The CSV file will only contain the columns that are currently visible in the Contacts table. If a field is missing in your exported data, go back and check the column settings before exporting again.
Once you confirm your selection, click the "Export" button, the system processes the data and downloads a CSV file to your local system without any extra steps.