This guide walks you through how to successfully import contacts into Agent Suite
ensuring your leads are properly organized, tagged, and ready for follow-up.
Before importing, ensure your file meets the following requirements:
File must be in .CSV format
Each column should have a clear header (e.g., First Name, Last Name, Email, Phone)
Each row should represent one contact
Phone numbers must be formatted in E.164 format (e.g., +15551234567)
Supported Fields Include:
First Name
Last Name
Phone
Company Name
Tags
Custom Fields
Log into your account.
Navigate to Contacts

Select Import Contacts

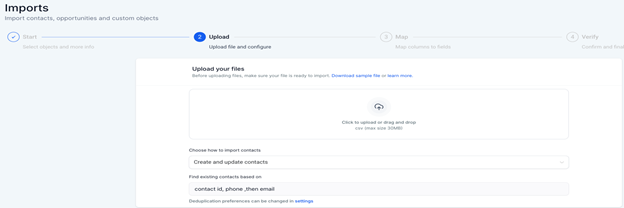
Step 3: Upload Your File
Click Upload File.
Select your CSV file (CSV files up to 50MB).
Allow the system to process your upload.
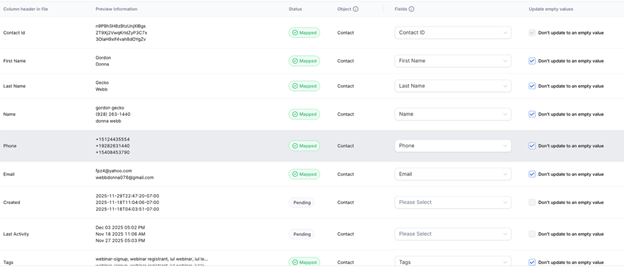
Step 4: Map Your Fields
Match each column in your CSV file to the correct system field.
Ensure phone and email fields are mapped correctly.
Confirm all required data is aligned.
Note: Agent Suite includes most required custom fields by default. In most cases, you will only need to map your columns to existing fields.

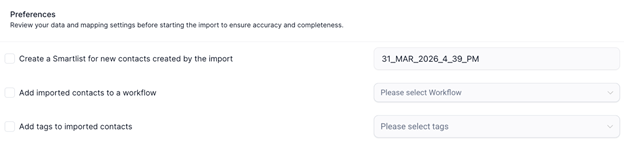
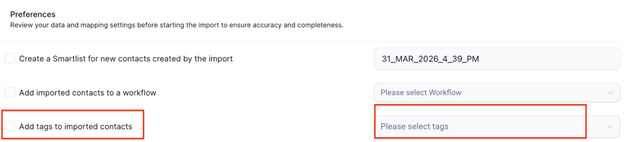
Before completing the import, you will see a screen where you can create a smart list or assign tags.
At this stage, ensure you:
Add the appropriate product tag (eg. mortgage protection, final expense)
Add any additional tags needed to manage and segment your contacts
Example Tags:
Facebook Lead
Webinar Registration
Cold List
For Agent Suite users, tagging is required for proper systemfunctionality.
Each contact must include a tag that identifies the type of insurance product, such as:
Mortgage Protection
Final Expense
Medicare
IUL
Annuities
Why Tagging is Critical
If contacts are not tagged correctly:
AI may send incorrect or irrelevant messages
Leads may be routed to the wrong pipeline
Opportunities may not be created
The AI may not understand how to respond when a lead replies via SMS
When contacts are tagged correctly:
Messaging is aligned with the lead’s intent
Conversations remain accurate and relevant
Opportunities are created and routed properly
Overall conversion rates improve
Click Import to finalize.
Once completed:
Contacts will appear in your system
Tags and fields will be applied
Important: Workflow Usage
Do not add contacts to workflows during the import process.
Workflows should only be triggered after:
Tags have been verified
Fields are correctly mapped
Contacts are properly segmented
Triggering workflows too early can result in:
Incorrect messaging
Poor customer experience
Misrouted leads
Troubleshooting
Contacts Not Importing
Verify CSV formatting
Ensure required fields are valid
Phone Number Errors
Confirm numbers are in E.164 format
Example: +15551234567 (not (555) 123-4567)
Field Mapping Issues
Check column headers
Ensure custom fields exist before import
Duplicate Contacts
Review duplicate handling settings prior to import