Step-by-Step Process:
From your workspace, go to Settings > Billing.
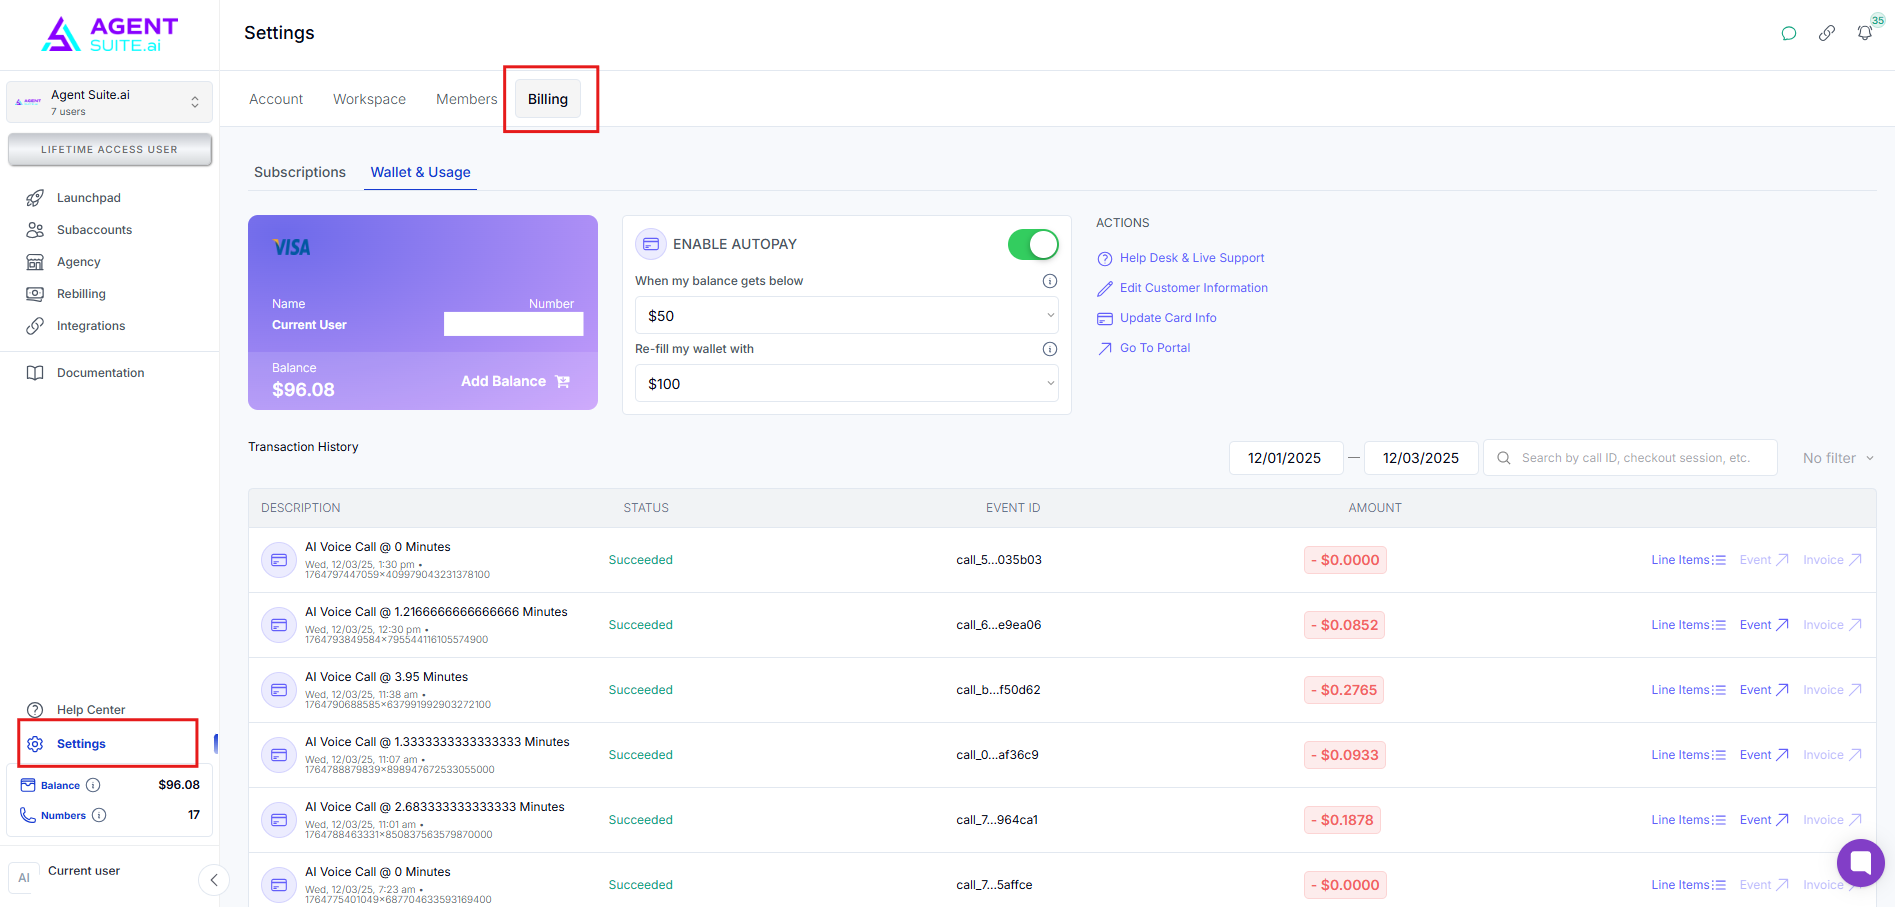
You will see:
Card on file
Auto-pay toggle
Current subscription info
Wallet balance
Transaction history
Subscription = Monthly recurring charge for platform access (plus extras like phone numbers or voice features).
Wallet = Prepaid balance for usage-based billing (e.g., calls, messages).
Usage charges are deducted from the wallet, not charged directly to your card each time.
Click “Update Card Info” to change the card used for refilling the wallet or paying subscription fees.
Click “Enable Auto-Pay” to ensure your wallet refills automatically when it drops below a certain threshold.
This prevents service interruptions during high-usage periods (like large call deployments).
If auto-pay is off, click “Add Balance” to manually fund the wallet.
Funds are immediately available for usage billing.
We recommend to always ENABLE AUTOPAY this will help avoid disruptions
Transactions are categorized as:
Credit: Funds added to your wallet (manual or auto-pay)
Debit: Usage deductions (e.g., $0.05 for a message)
This history acts as a ledger and shows every charge and refill.
For credit transactions, click “Download Invoice” to access a PDF of the charge.
Includes full metadata (Stripe ID, reference info).
Each debit transaction includes an event link (e.g., call or message).
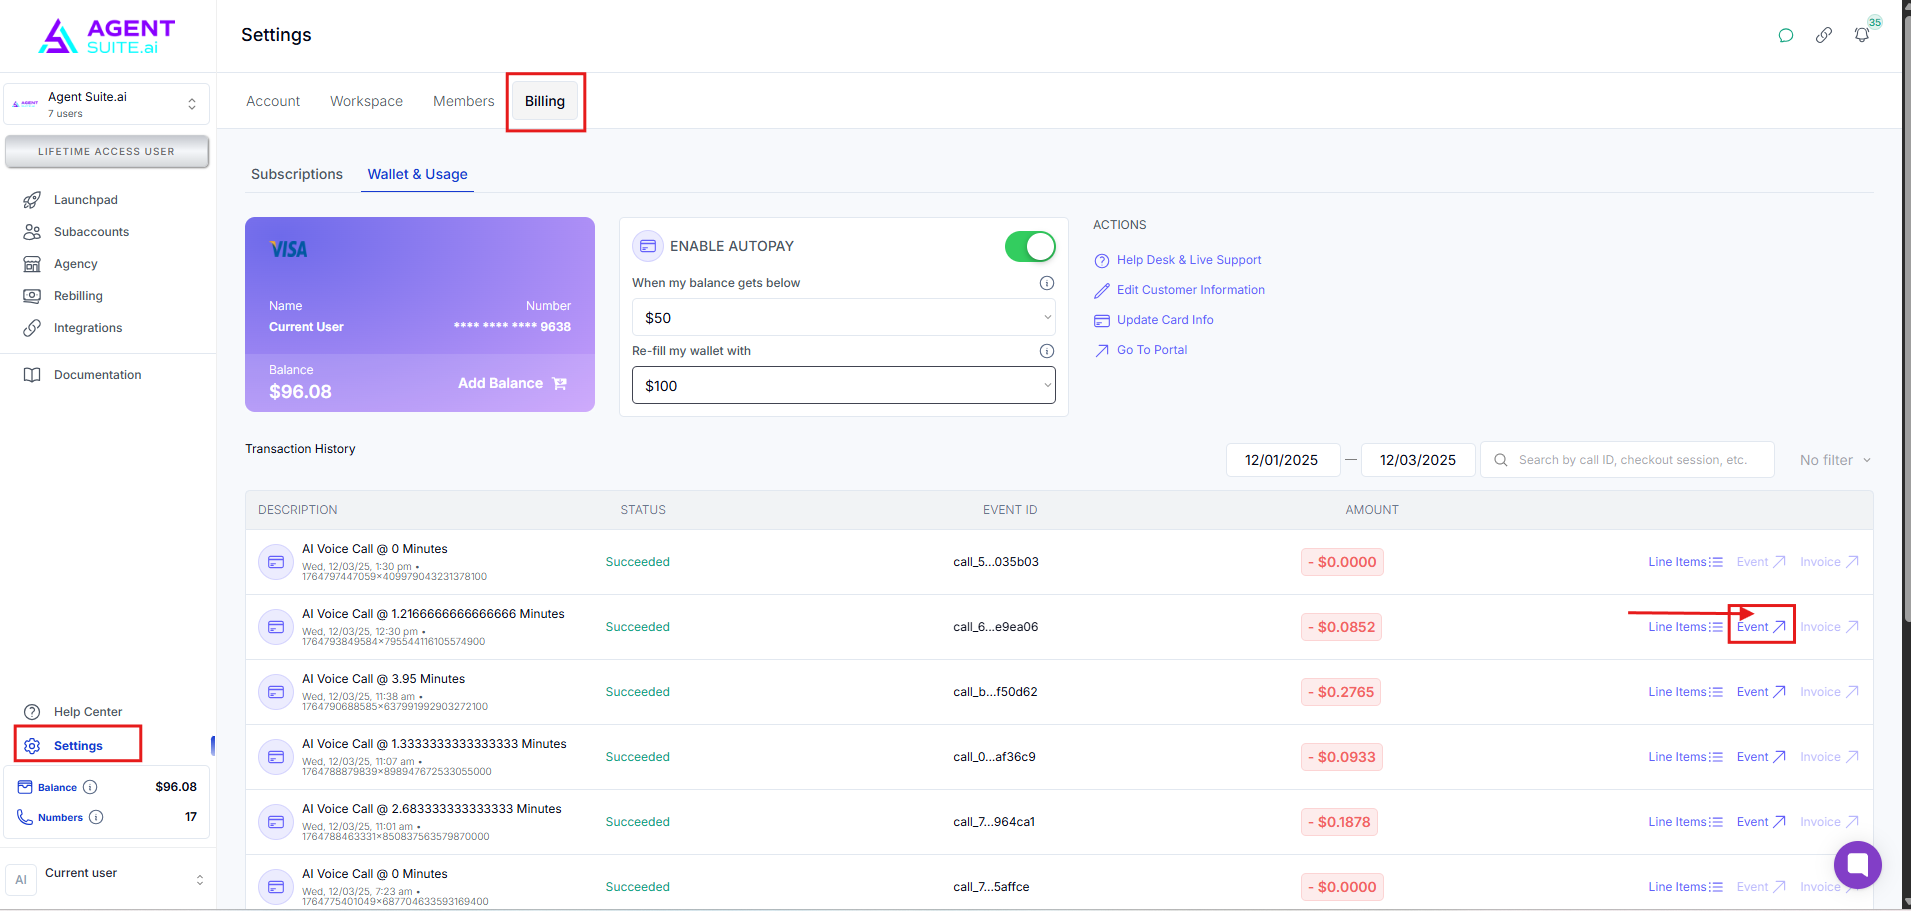
Click the link to open the original event in a new tab and verify the charge (e.g., call duration, usage type).
Click 3 dots (...) to open event and capture more information
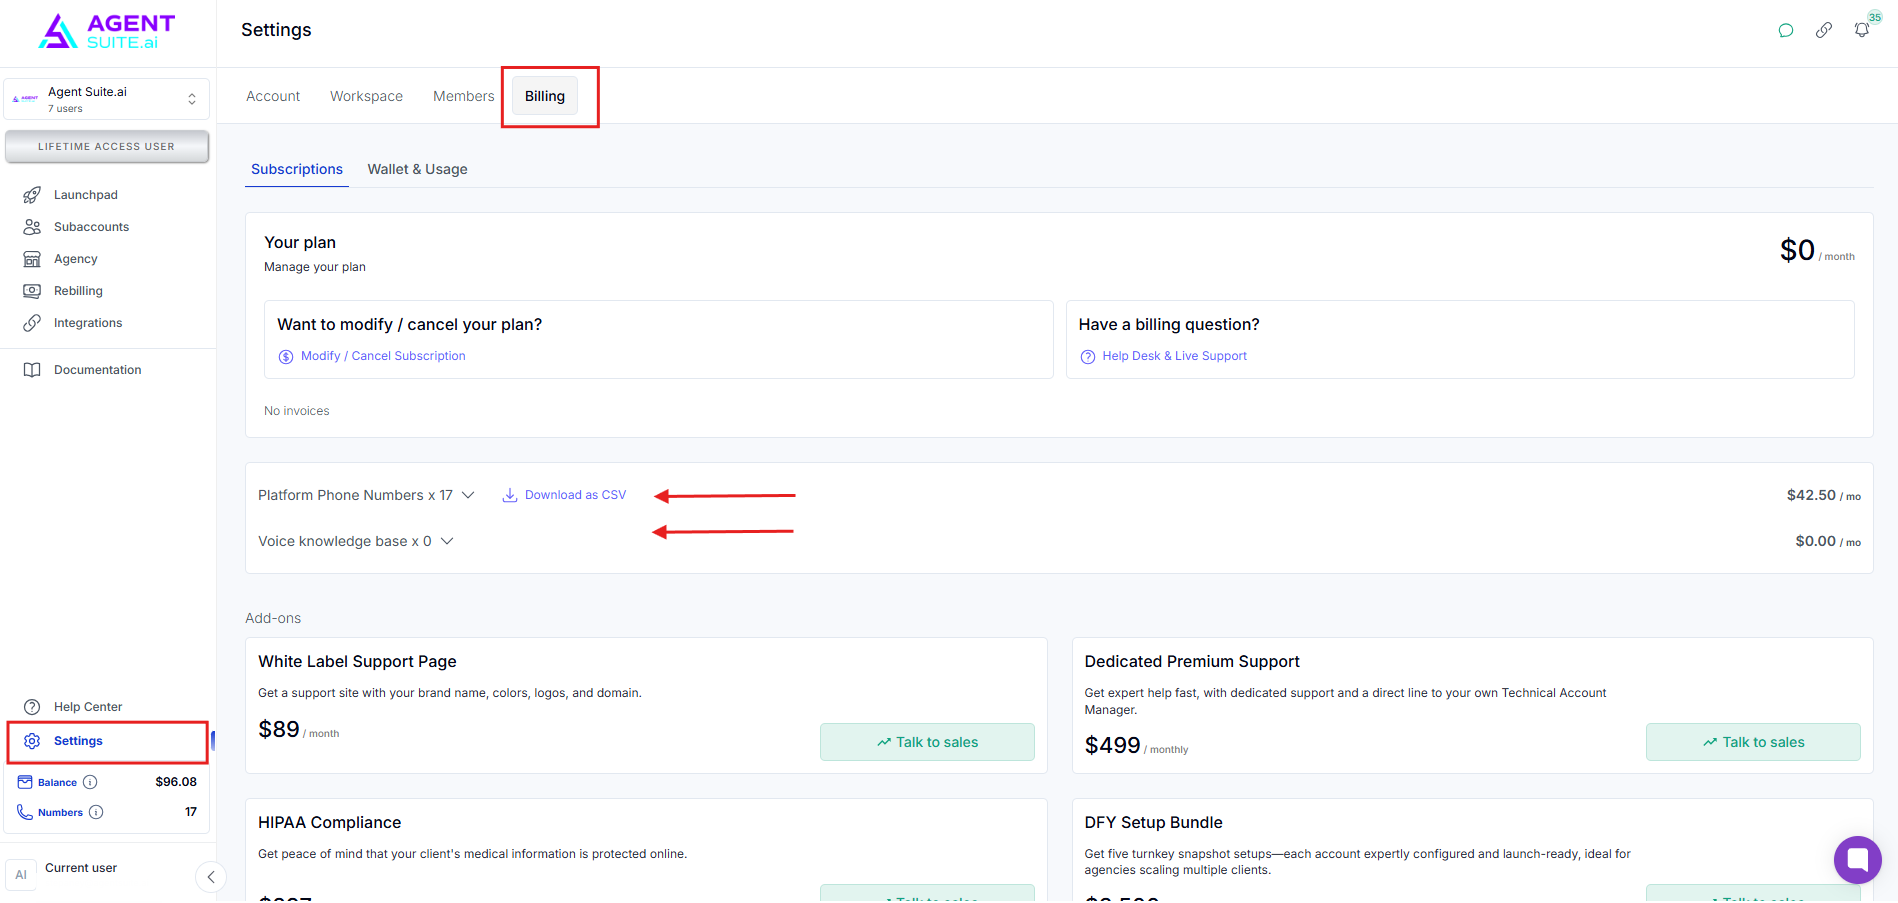
Sub-account actions (like adding phone numbers or voice features) roll up to the main workspace billing.
You can:
See all numbers added under the Subscription section.
View associated sub-accounts for each item.
Repeat for Voice Knowledge Bases.
Q: What’s the difference between a subscription and the wallet?
A: Subscription = platform access + add-ons. Wallet = pay-as-you-go usage.
Q: Why am I seeing lots of tiny charges?
A: Those are usage debits from your wallet, not your card. Your card is only charged when adding balance.
Q: How do I stop my wallet from running dry?
A: Enable auto-pay to auto-refill your wallet below a certain threshold.
Q: How do I trace where a charge came from?
A: Click the event link in the transaction history to see the specific call/message.
Q: Can I download invoices for charges?
A: Yes, invoices are available for all credit (card) transactions.