Step 1. Connect Facebook integration with CRM. (refer to <support doc> to understand in depth creation flow).
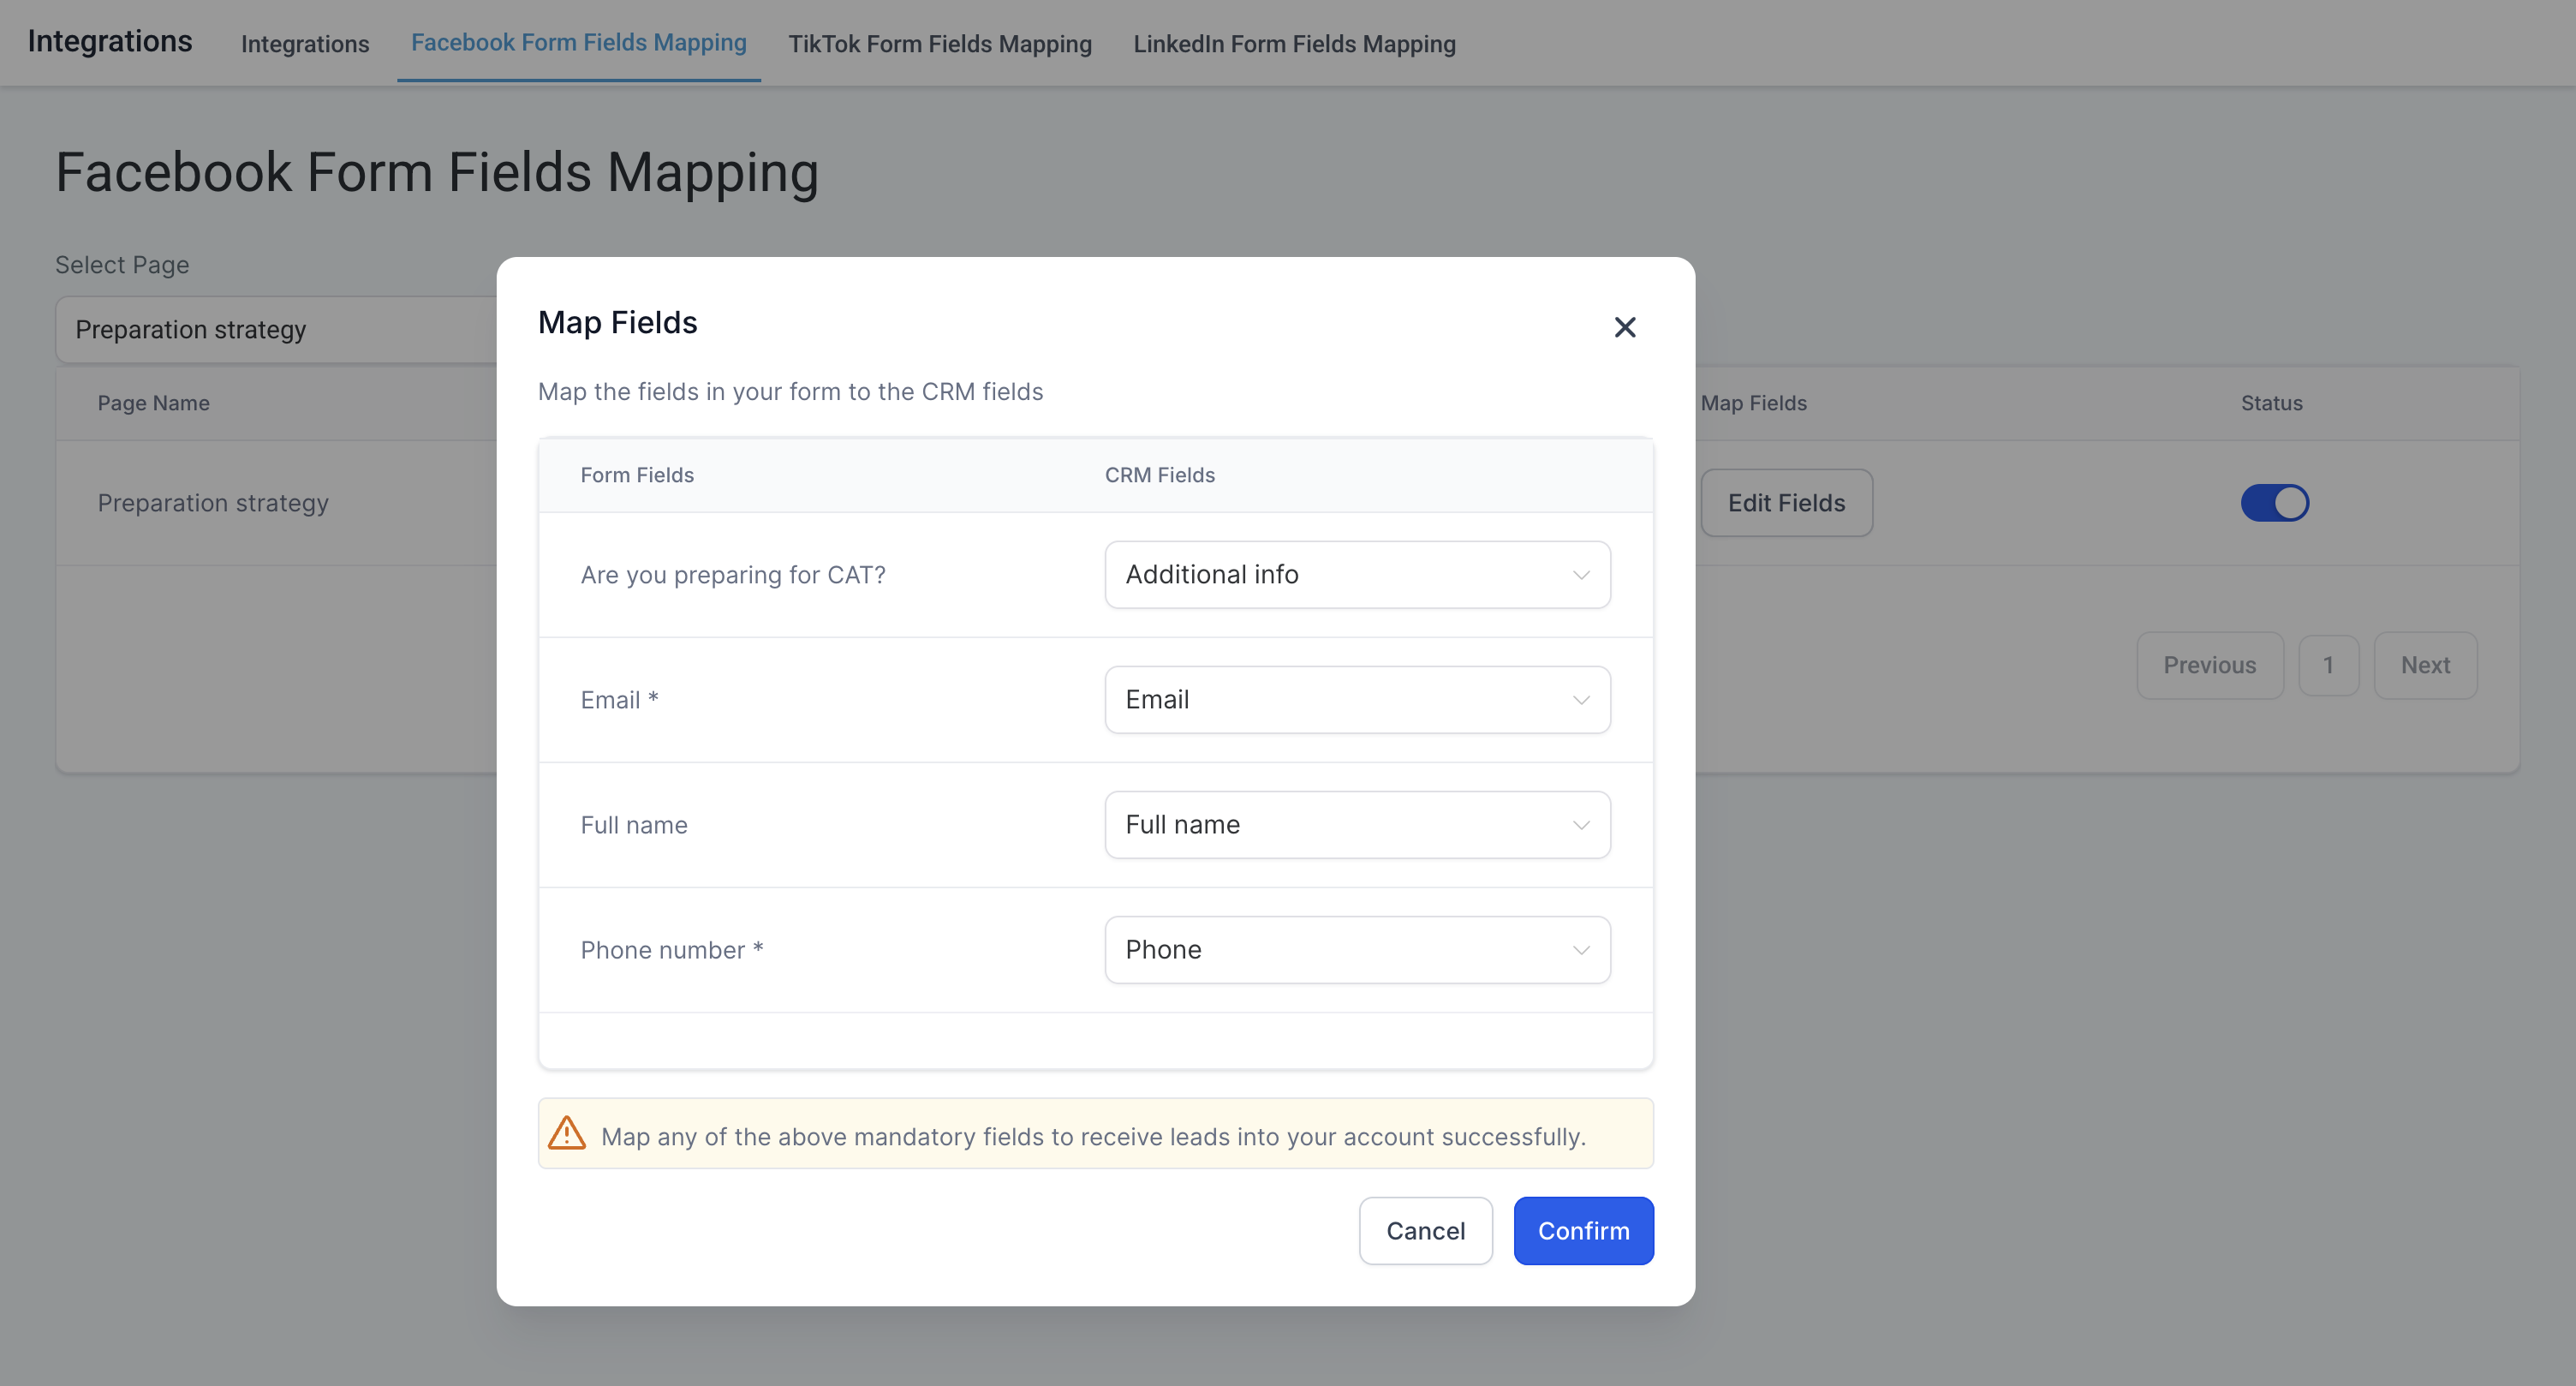
Step 2. Once FB <-> CRM integration is setup, you would be required to map the facebook lead form's field with relevant fields on CRM's end. (settings >> Integrations >> Form field Mapping)
Step 3. The standard fields are auto-mapped, such as:
full_name → Contact Name
email → Email
phone_number → Phone
For custom fields:
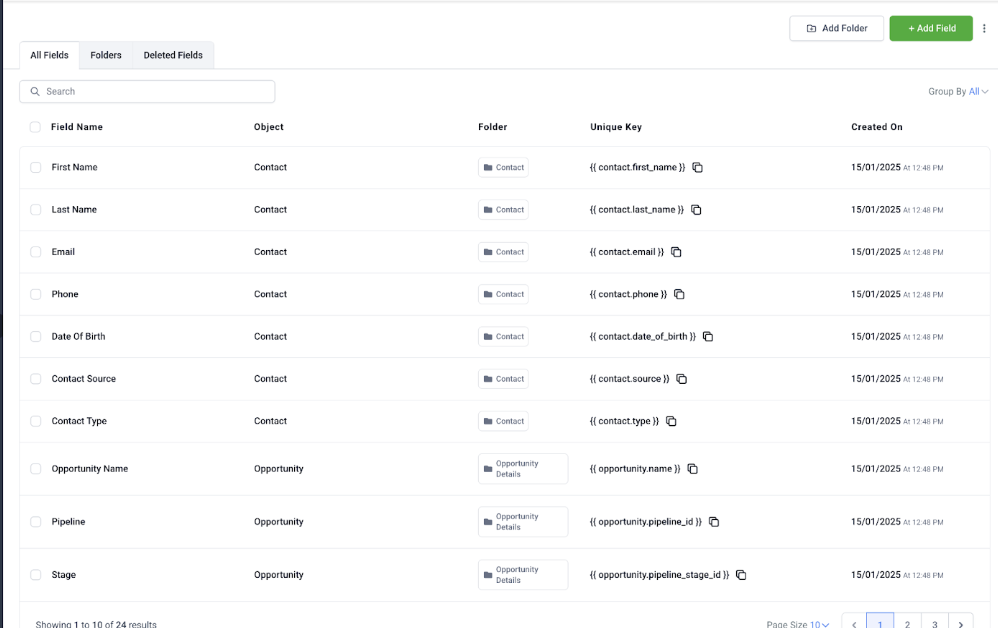
You can create Contact Custom Fields in your CRM.
Then manually map those Facebook form fields to the appropriate custom fields.
Step 4. Once mapped, the status will be shown as active with toggle button enabled and Map fields status as "Edit Fields"
P.S. The field type in facebook form should match the field type in CRM.

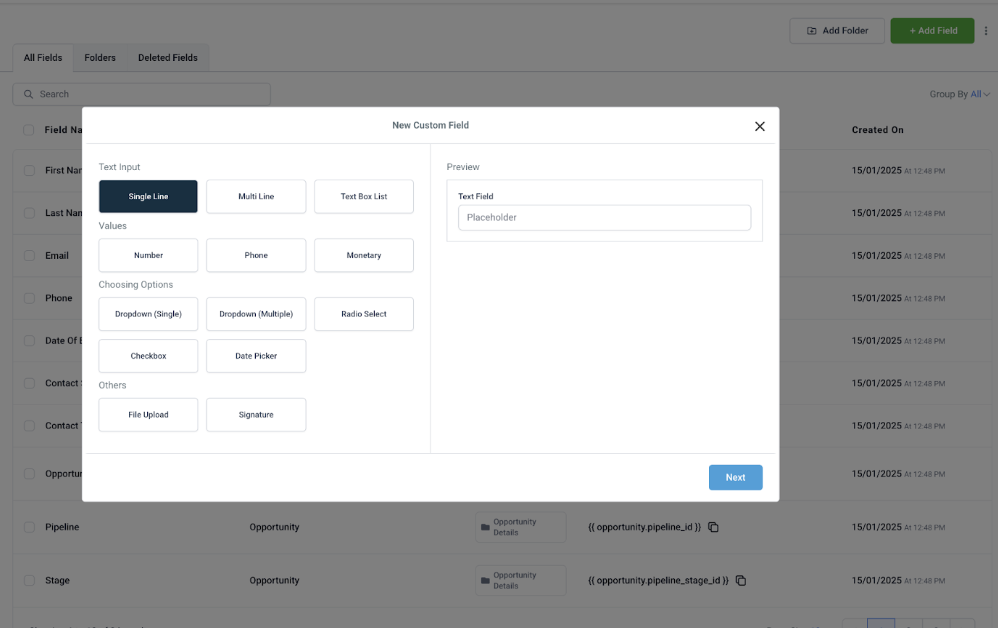
Navigate to Settings >> Custom Fields
Click “+ Add Custom Field”
Choose the object type (Contacts for this case)
Enter the field name, type (text, dropdown, checkbox, date, etc.), and optionally group it under a custom section.
Save the Custom Field
Once saved, the custom field will be available throughout the CRM where that entity type is used.
Supported custom fields when using Facebook Lead Ads:
TEXT
LARGE_TEXT
NUMERICAL
PHONE
MONETARY
DATE
DROPDOWN (single)
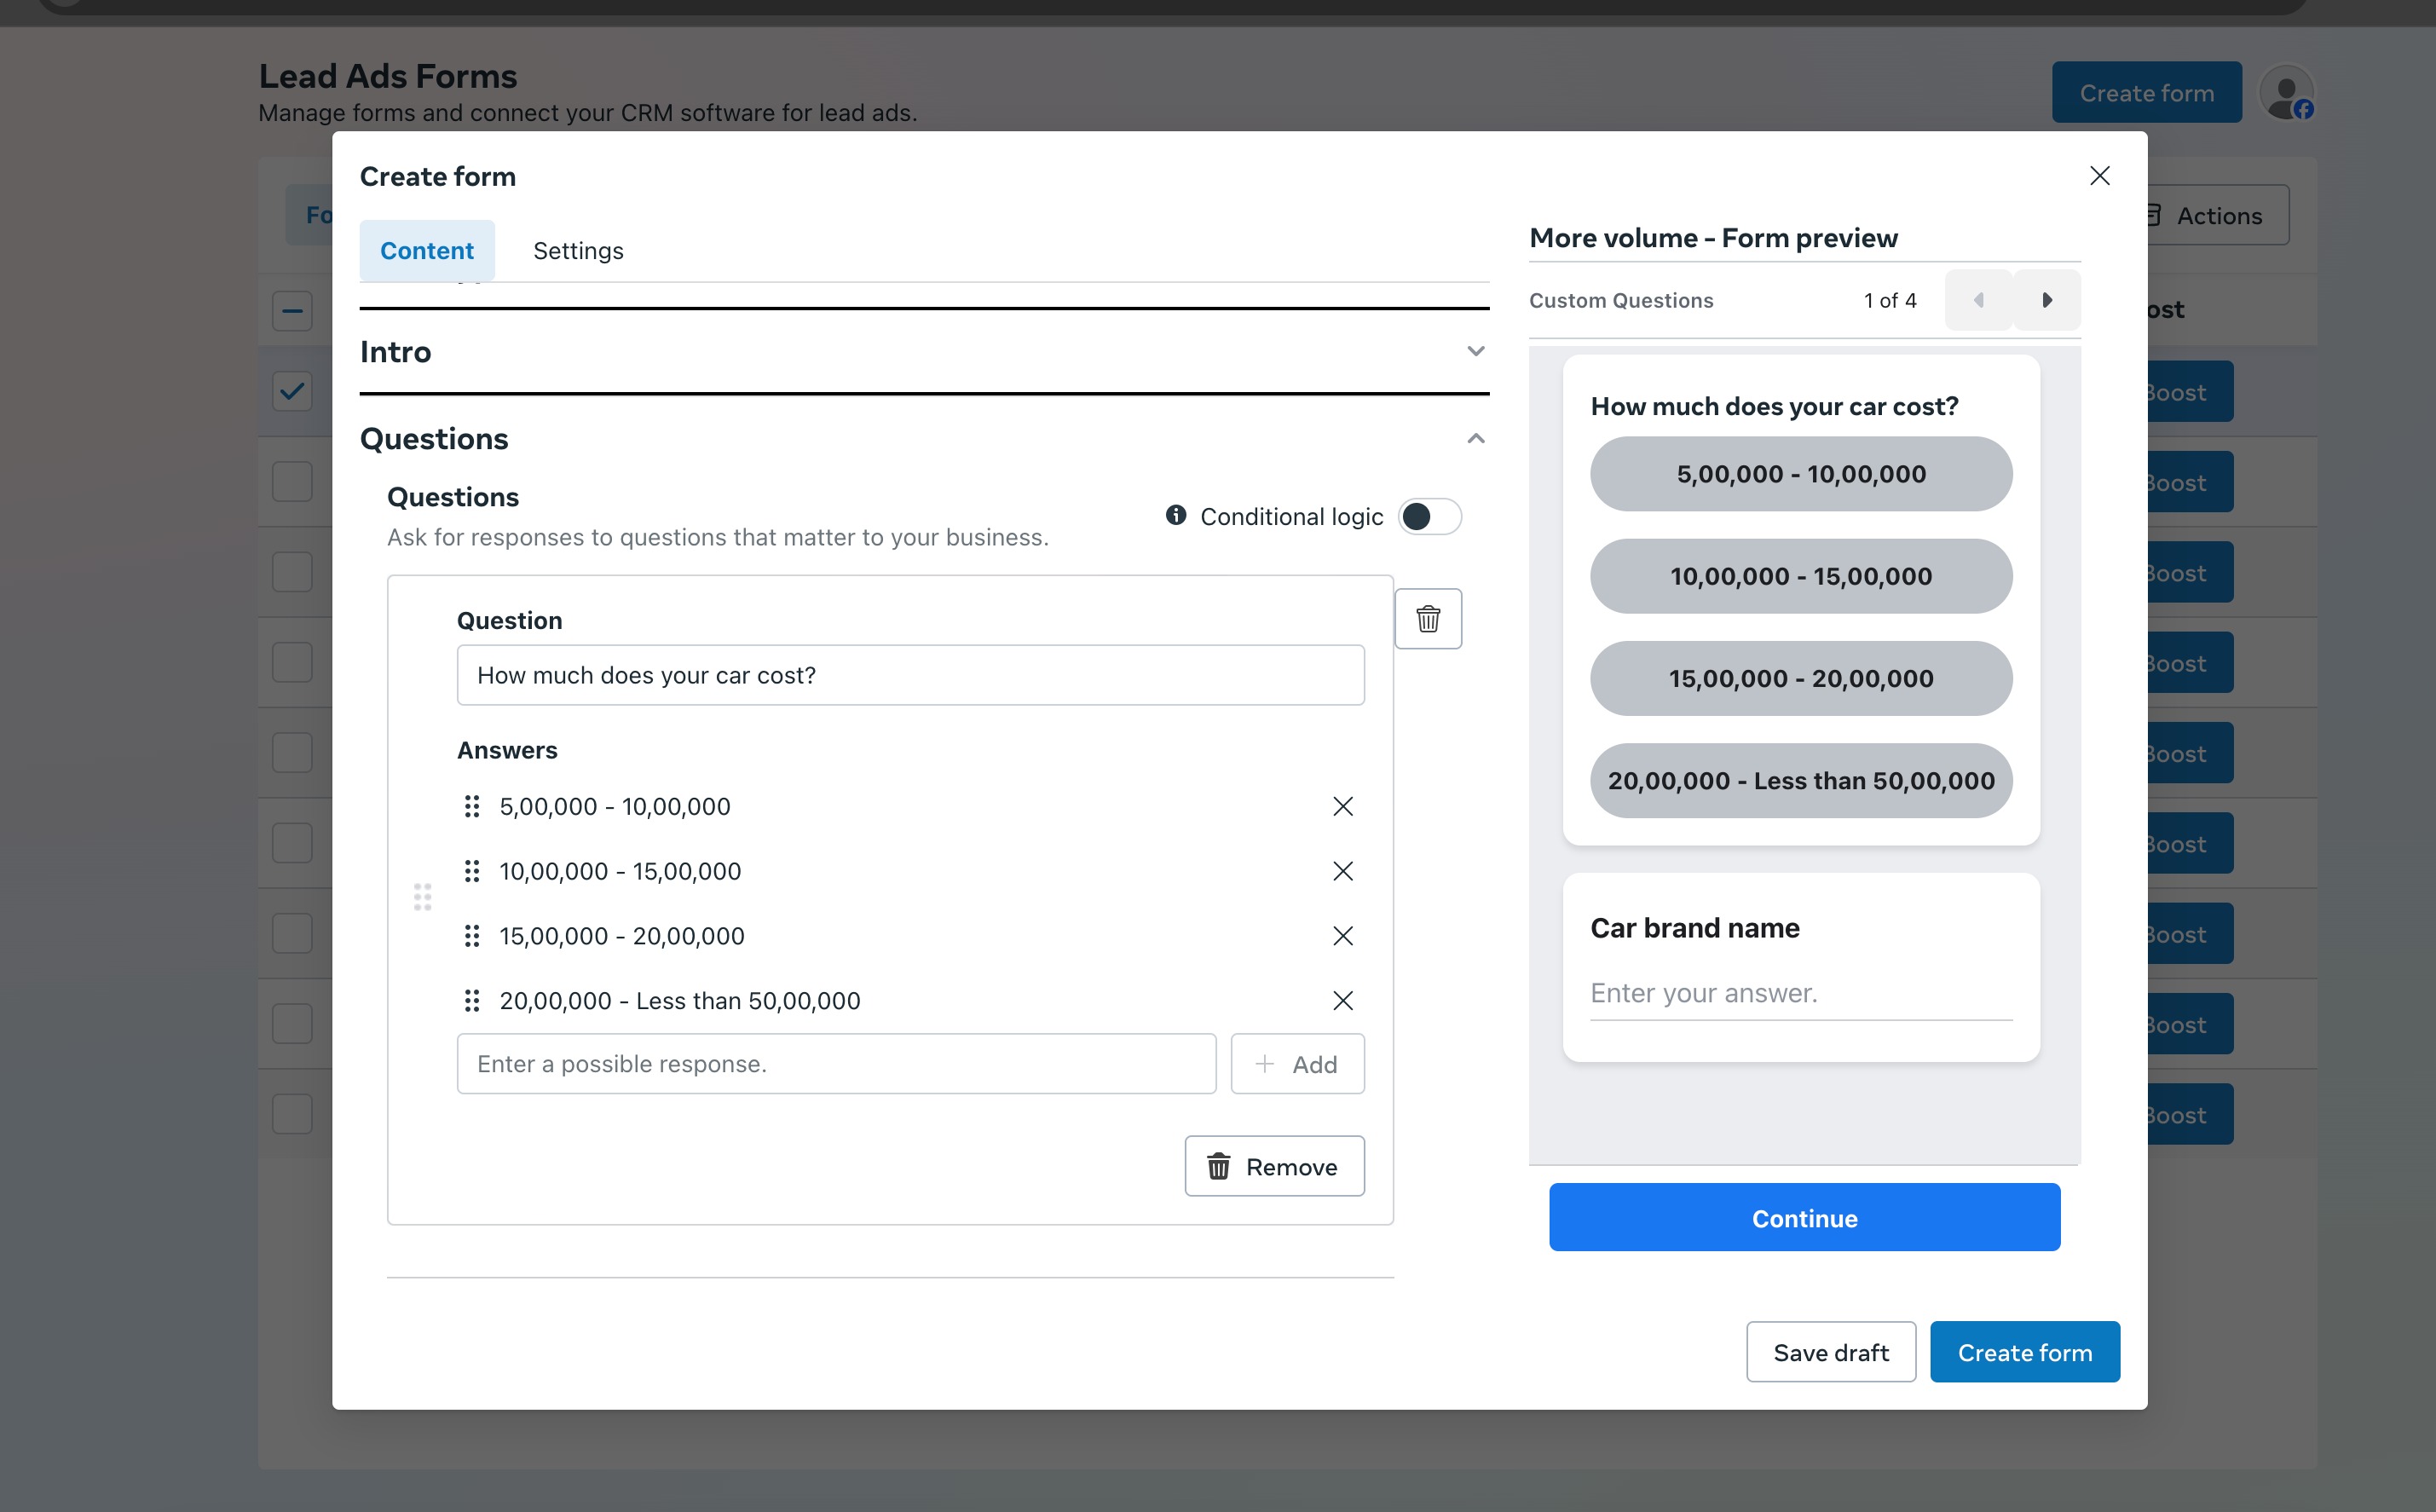
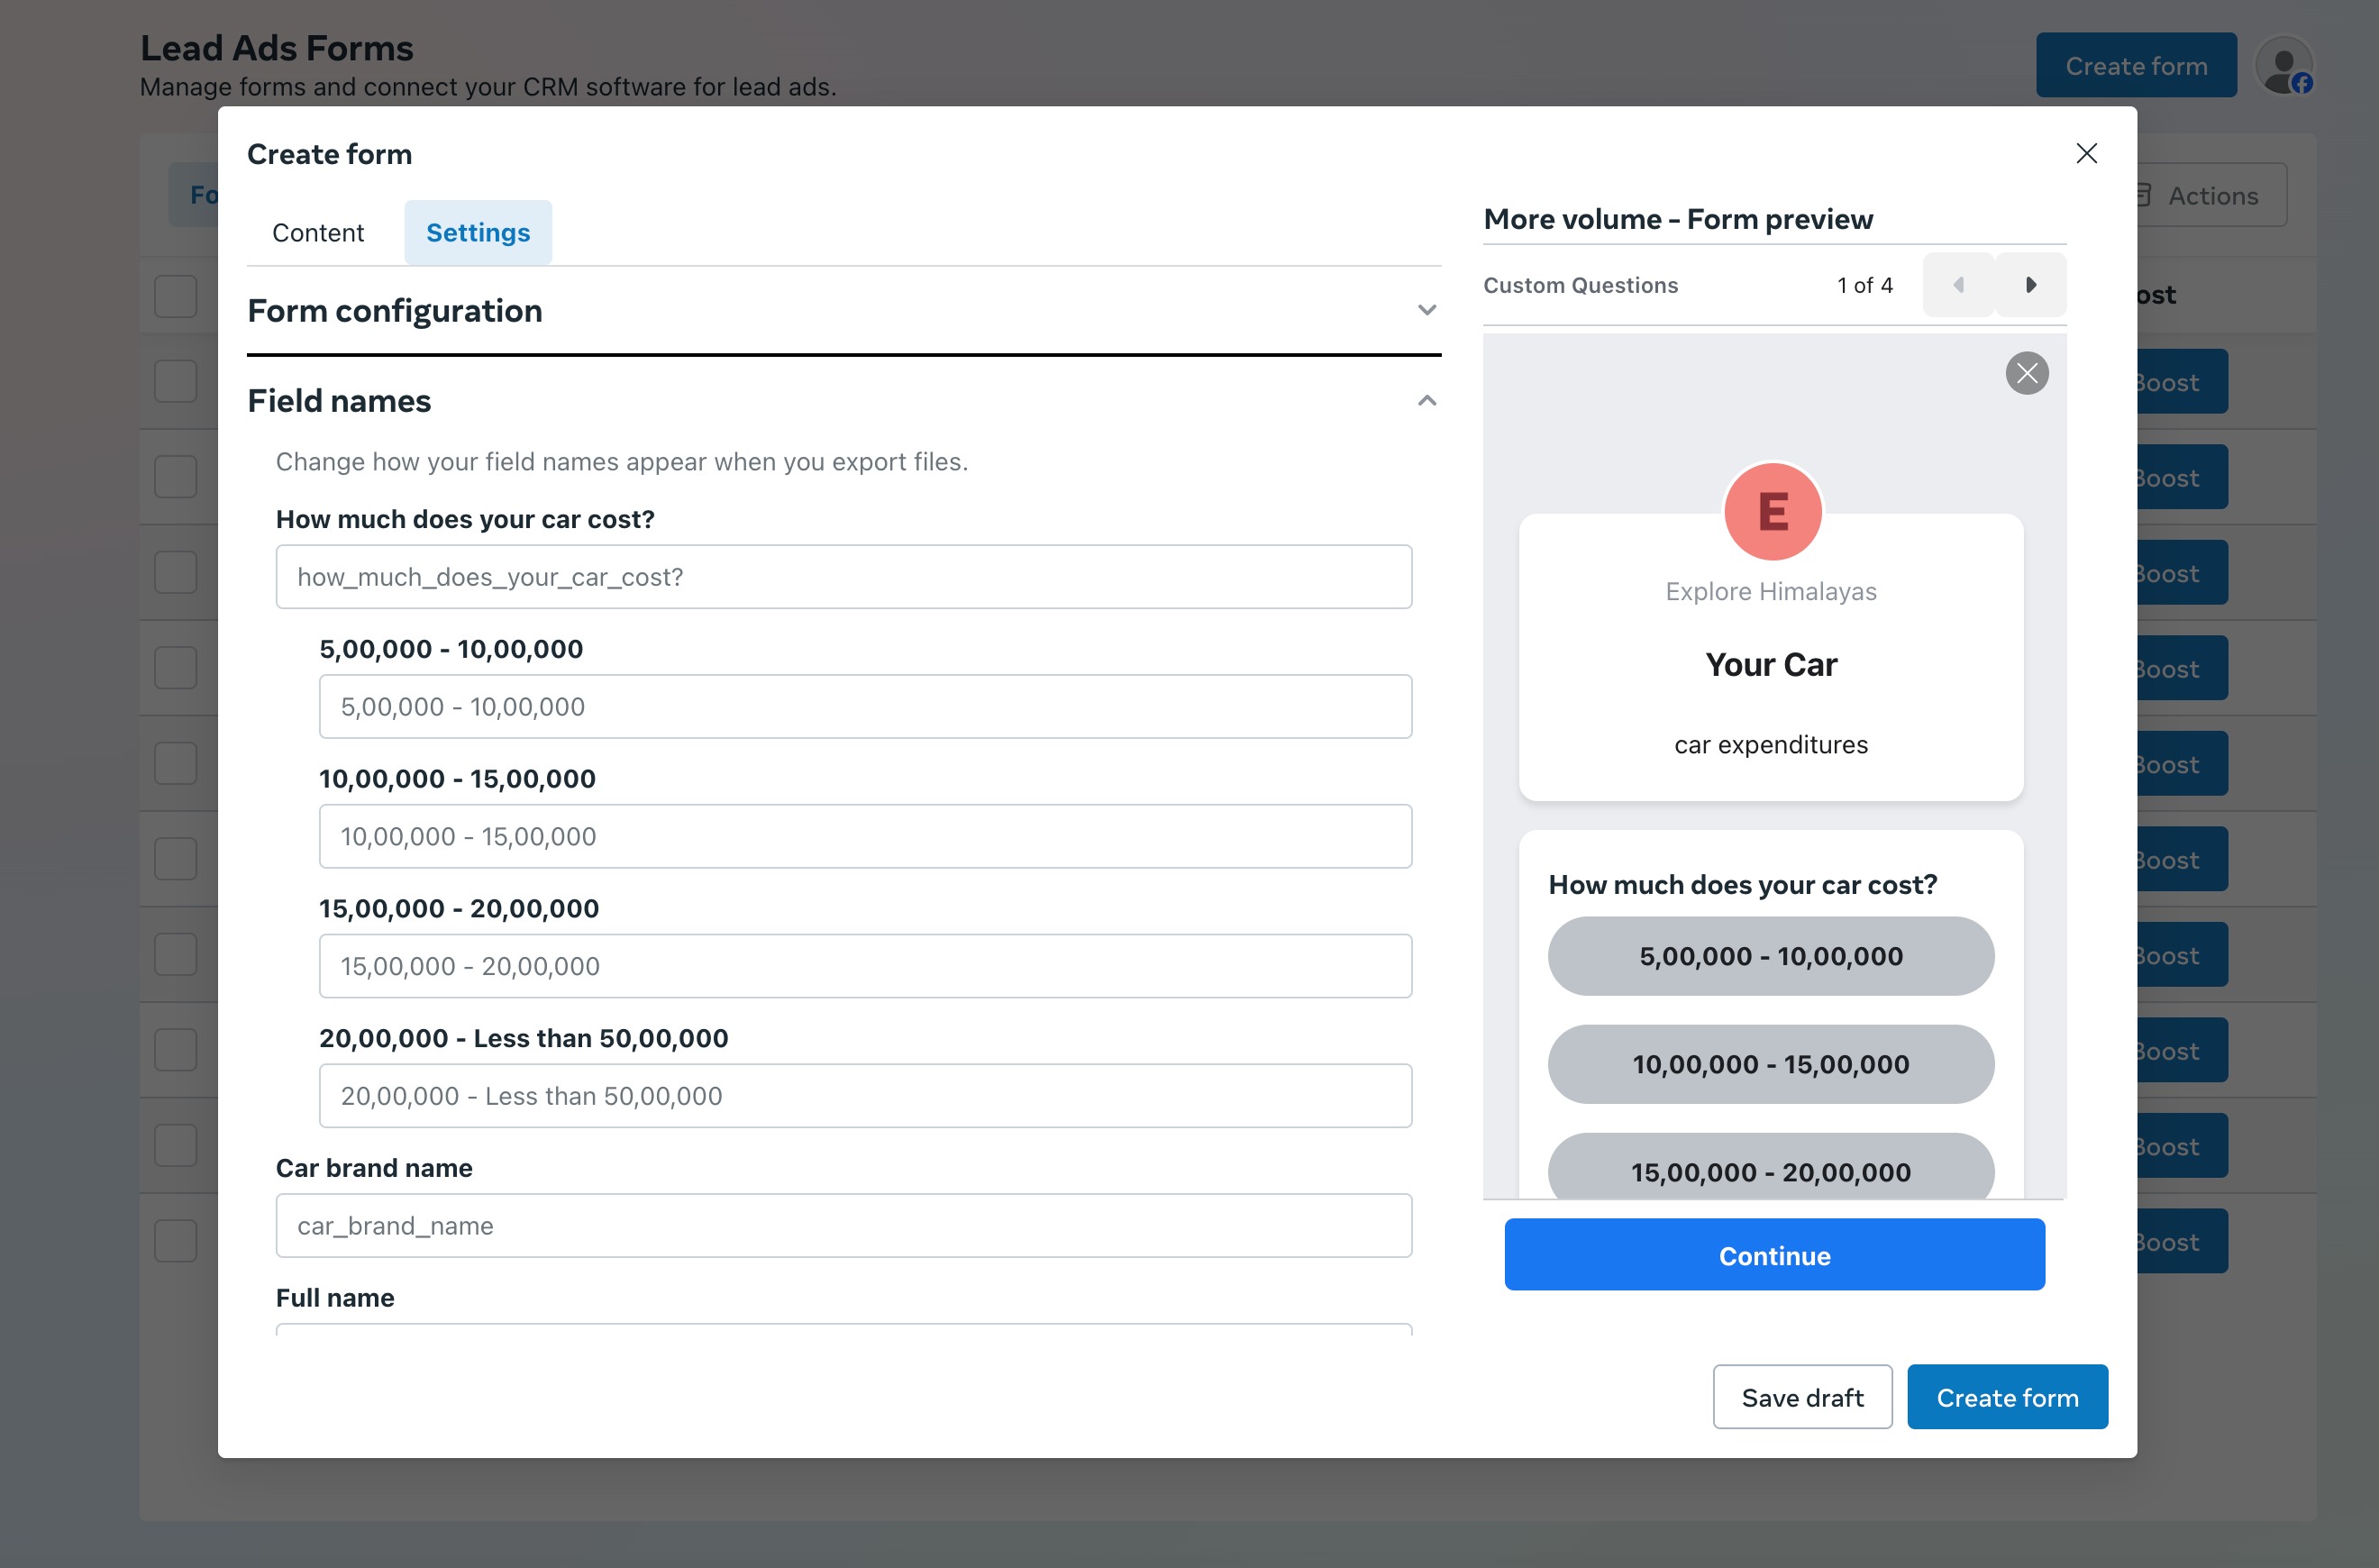
We recommend not to update the field names in Facebook forms under settings in FB form creation, as they may impact mapping at LC end: