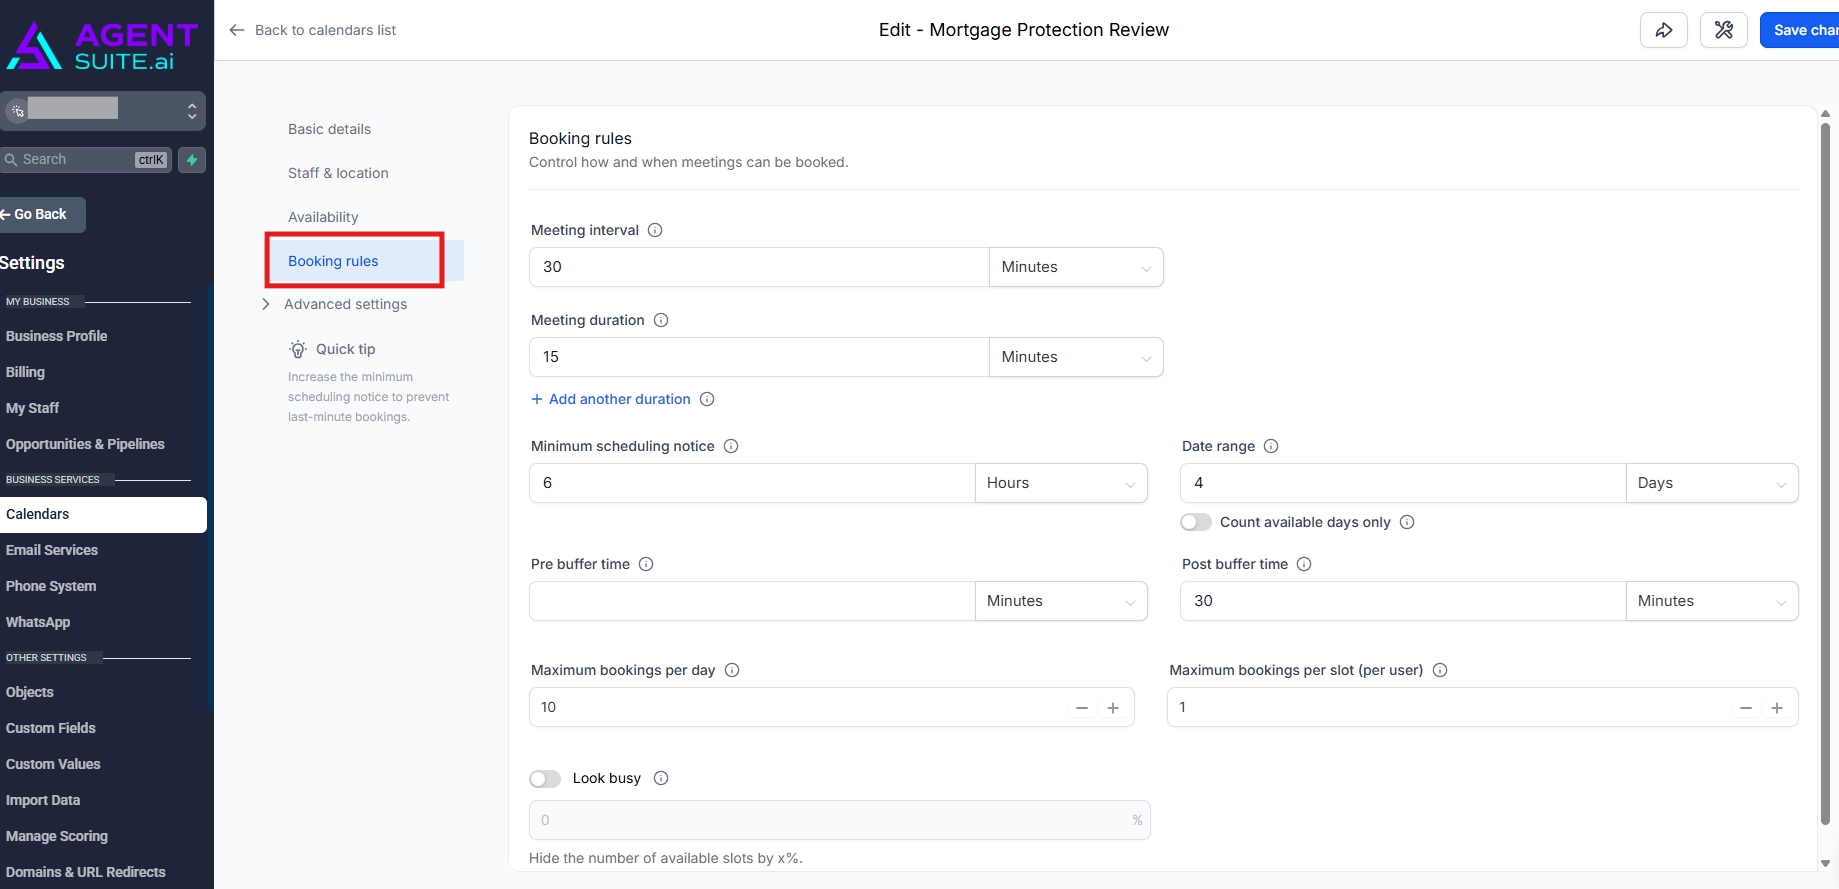
Click the 3-dot icon located in the far right side of the calendar table in the column titled "ACTION DROPDOWN". You'll see a small popup after clicking the icon, and in that popup you'll see a button labeled "EDIT".
Click the "EDIT" button to start editing that particular calendar.
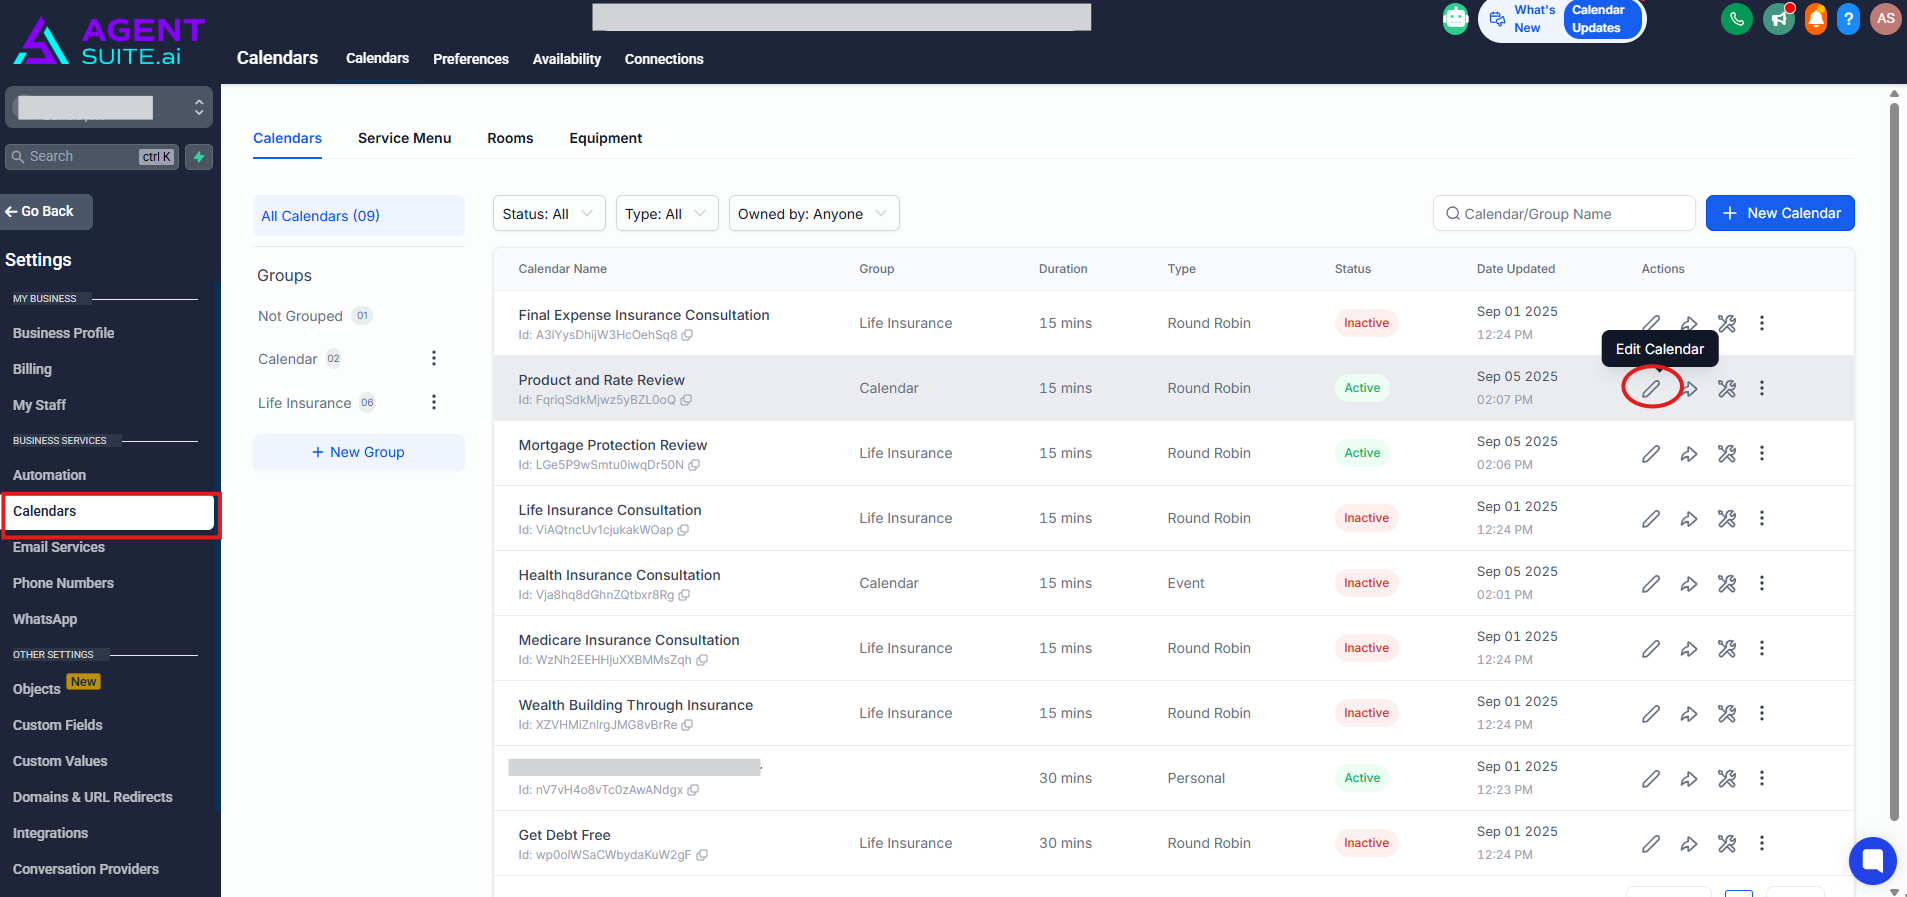
BASIC DETAILS
- is where you change the calendar name, add calendar description, meeting title and meeting color.
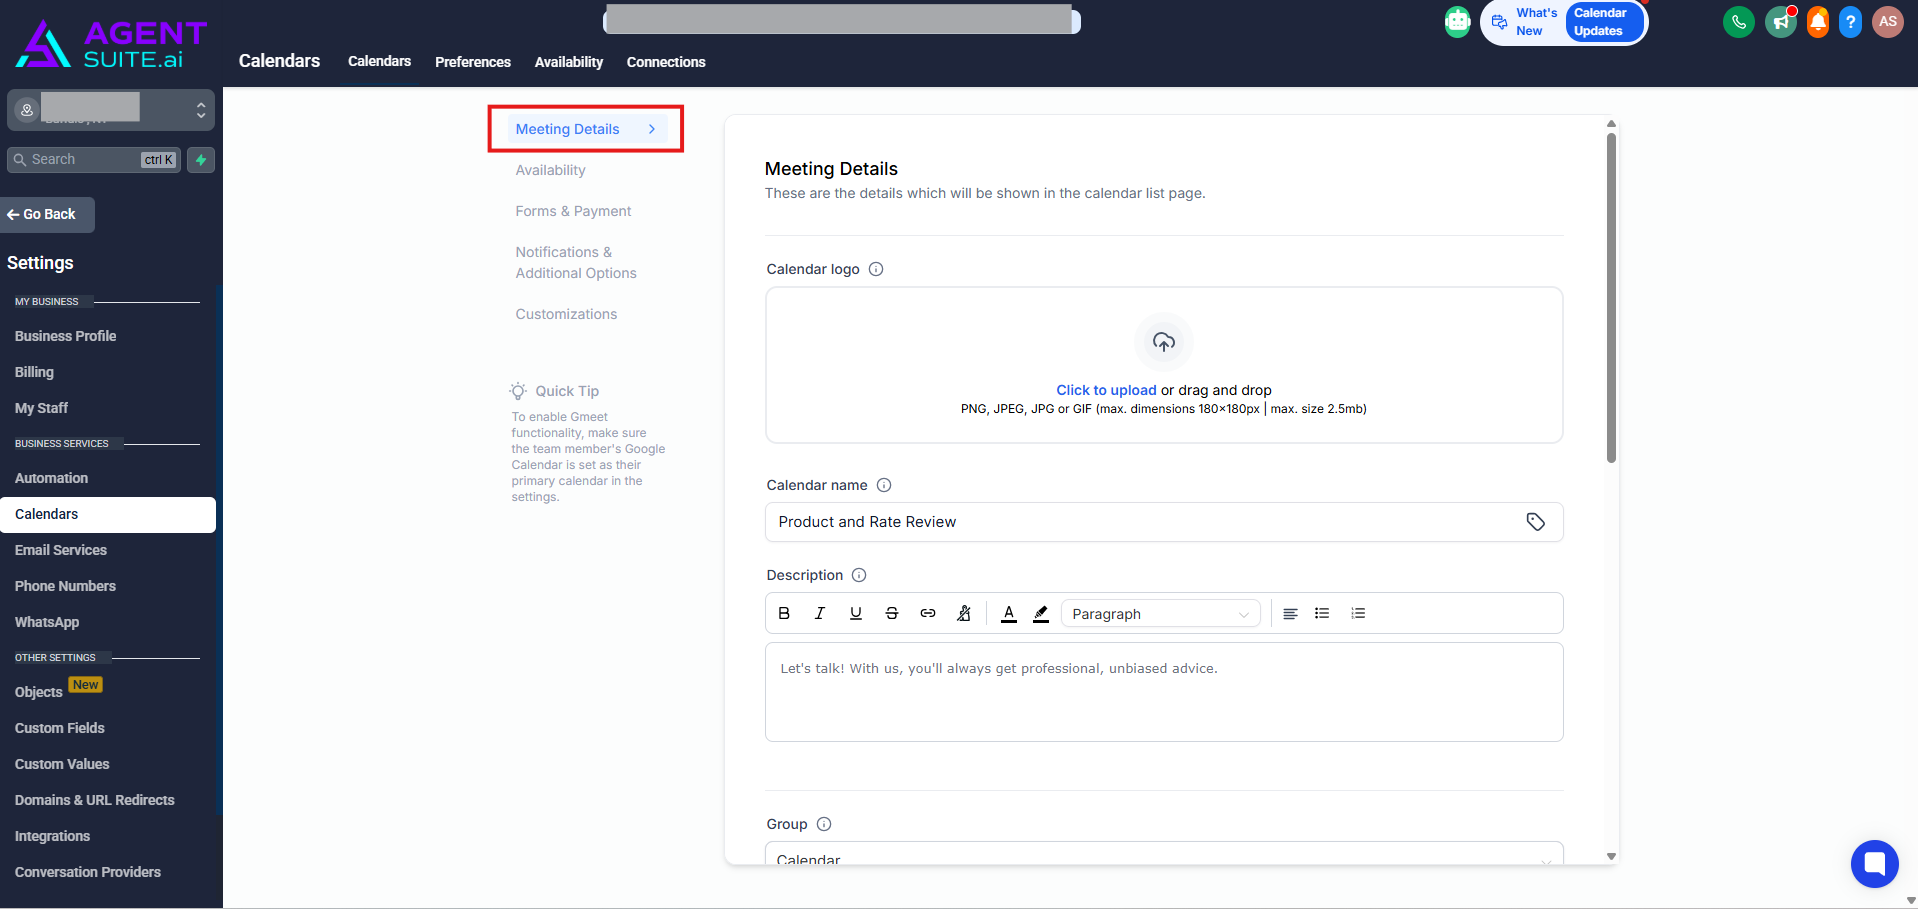
AVAILABILITY
- is where you can edit your schedule. It must have the right timezone.
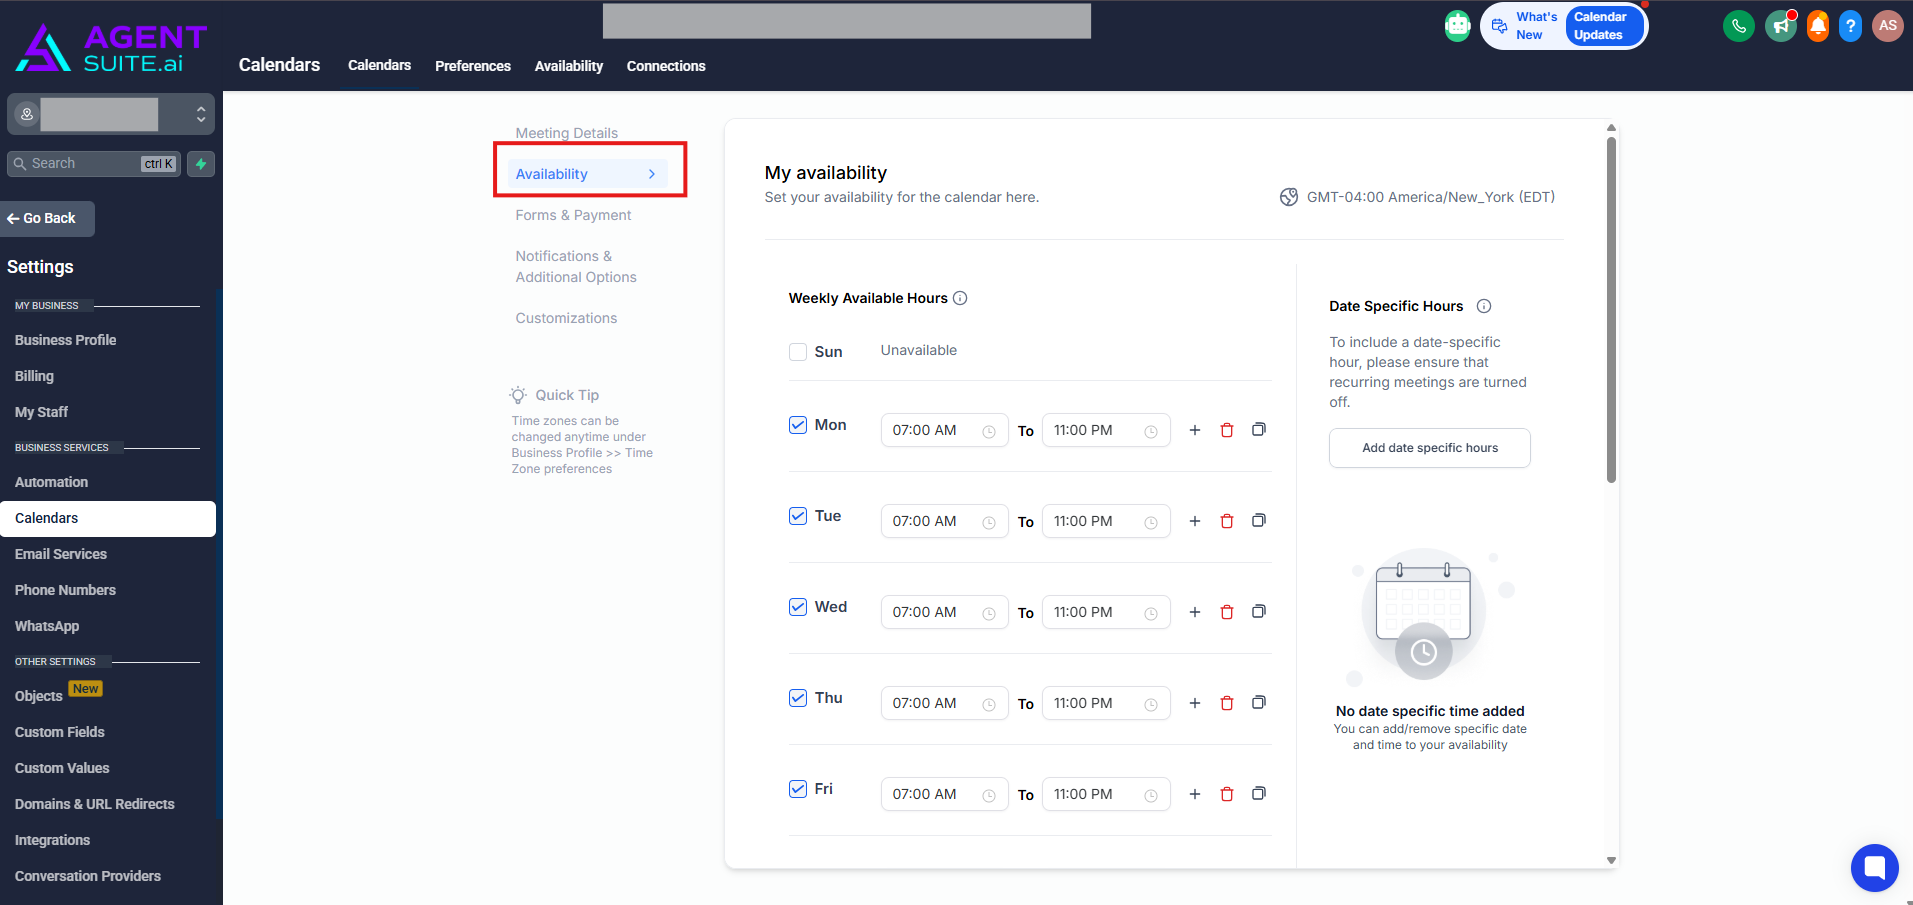
BOOKING RULES
Here are the key calendar settings that you'll likely encounter, along with brief explanations of each:
Slot Interval: This is the frequency at which appointments can be scheduled. For instance, if the slot interval is 60 minutes, appointments can be booked every hour.
Slot Duration: This is the length of each appointment. It determines how long an appointment will last once booked.
Buffer: This is the period set aside before or after an appointment. It ensures that appointments aren't booked back-to-back, allowing for preparation time, breaks, or transit between appointments.
Appointments per Slot: This setting determines the number of appointments that can be booked concurrently within a single slot. This is particularly useful for group sessions or webinars where more than one attendee can participate.
Appointments per Day: This sets the maximum number of appointments allowed daily. It's a way to control the workload and ensure you're not overbooked.
Minimum Scheduling Notice: This setting prevents last-minute bookings. For example, if you require at least a day's notice before an appointment, you can set this to 24 hours. This means appointments must be booked at least 24 hours in advance.
Date Range: This setting determines how far into the future someone can schedule an appointment. If you set it to 4 weeks, a client could schedule an appointment up to 4 weeks from the current date.